Get Started
The following sections cover how you can get started using the Komplete UI framework together with Kontakt.
Installation
Kontakt
Since Kontakt 8 is the centerpiece in developing and playing instruments you need to purchase a license for it.
After purchasing a license you can install it in Native Access.
Visual Studio Code
We recommend Visual Studio Code, because we provide a Komplete UI extension for it. With the extension enabled you get syntax highlighting, hover documentation and code snippets.
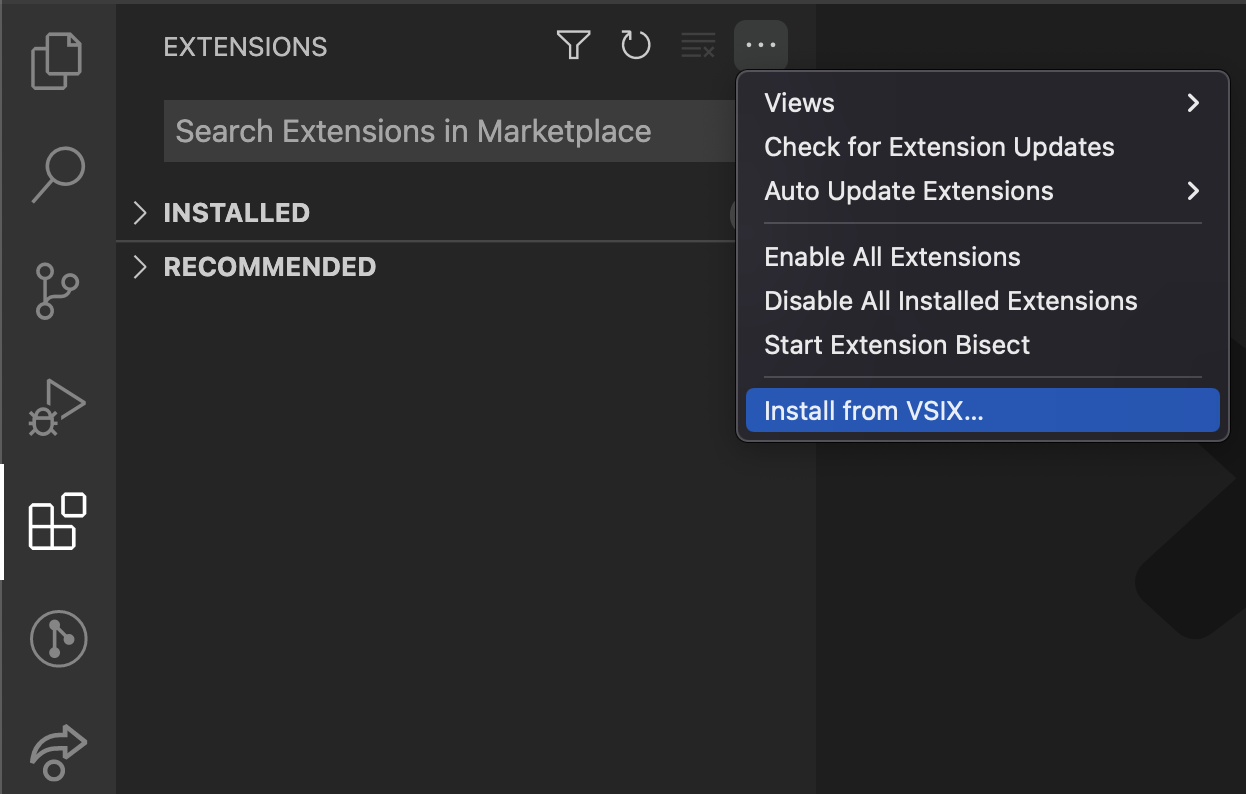
To install the extension navigate to the Extensions tab in VSCode, select the option to Install from VSIX..., and load the file you downloaded.
Kontakt Controls Package
A package with basic controls that can be connected to KSP. You can copy-paste it in each of your projects.
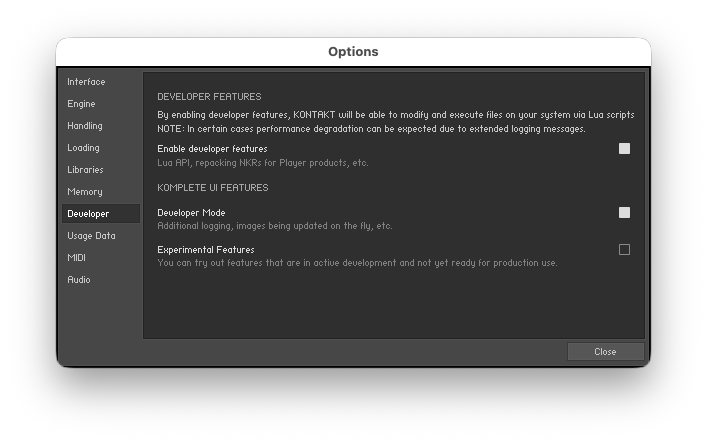
Enable Komplete UI feature toggles in Kontakt
In the Options dialog in Kontakt, navigate to the Developer tab to view and enable the Komplete UI feature toggles.
- The
Developer Modewill add useful features for developing an instrument, like additional logging while debugging, and image reload on the fly. - Enabling
Experimental Featuresis optional. It will provide access to features still in active development. Make sure not to use them in production code.

Create Your First Instrument
From Template
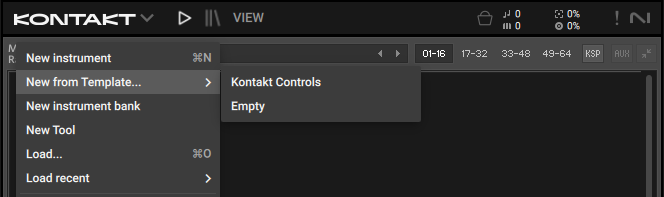
Turn on Enable developer features in Options.
As a result you will get the New from Template option in the File menu of the Classic View.
Choose a template, and create a library based on it.
This will automatically create the necessary library structure with a Resource Container, and Komplete UI file/s. You can now load the files in your library's Resources/komplete_scripts folder in Visual Studio Code and start tweaking the UI.
From Scratch
Set up your Instrument
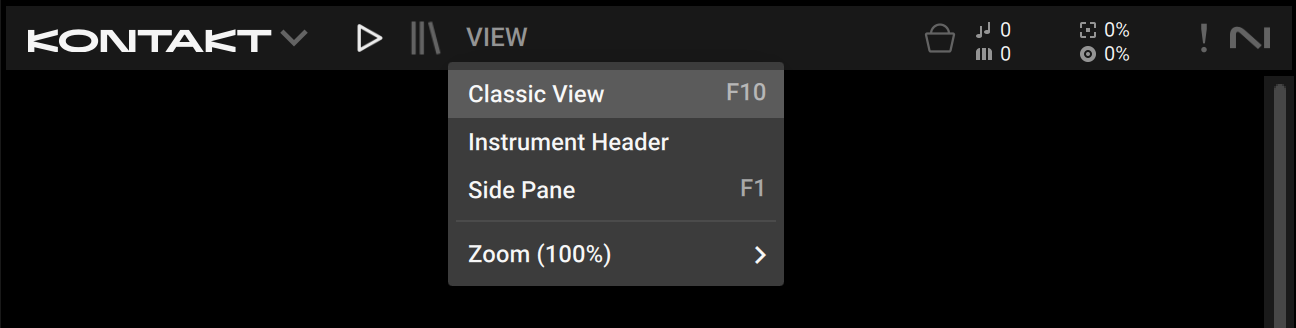
First, from the View menu item, select the Classic View in Kontakt.
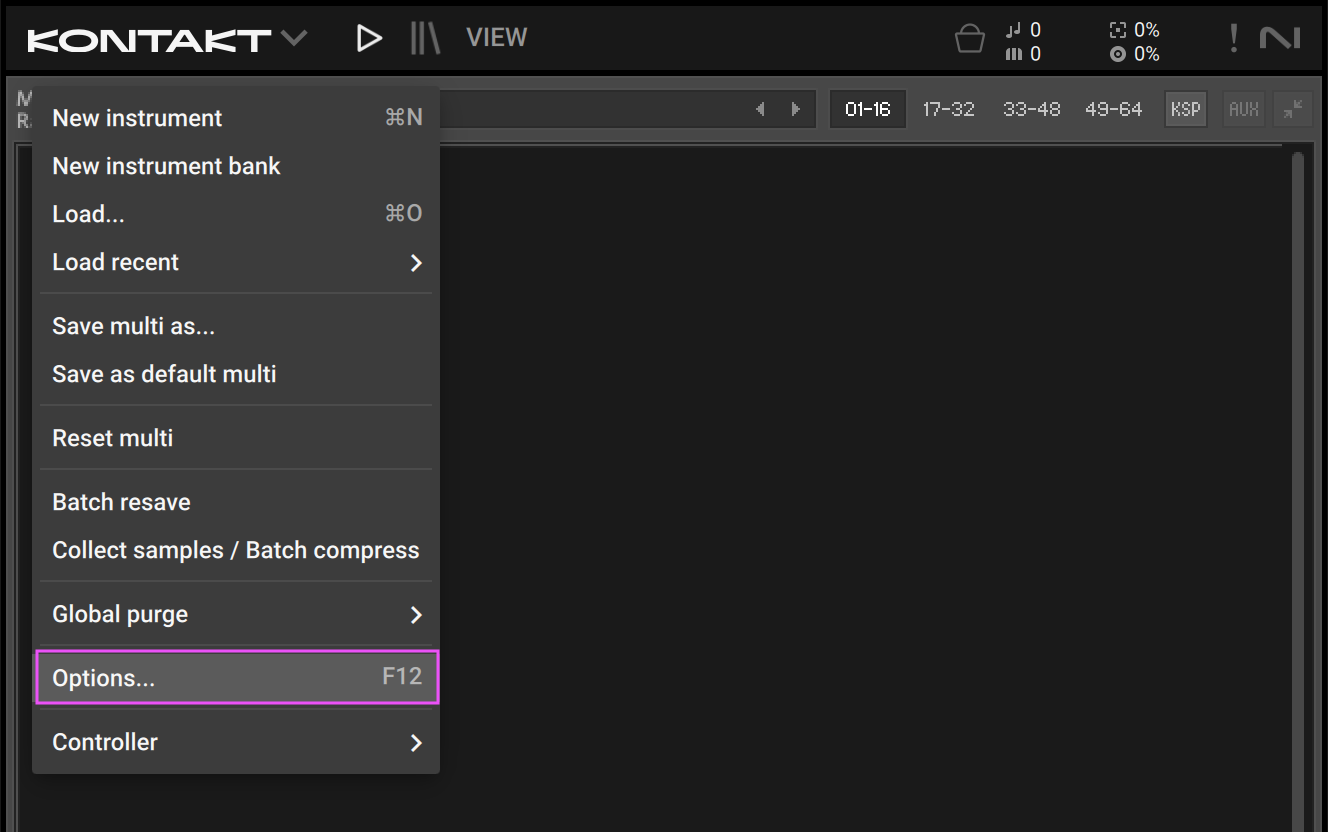
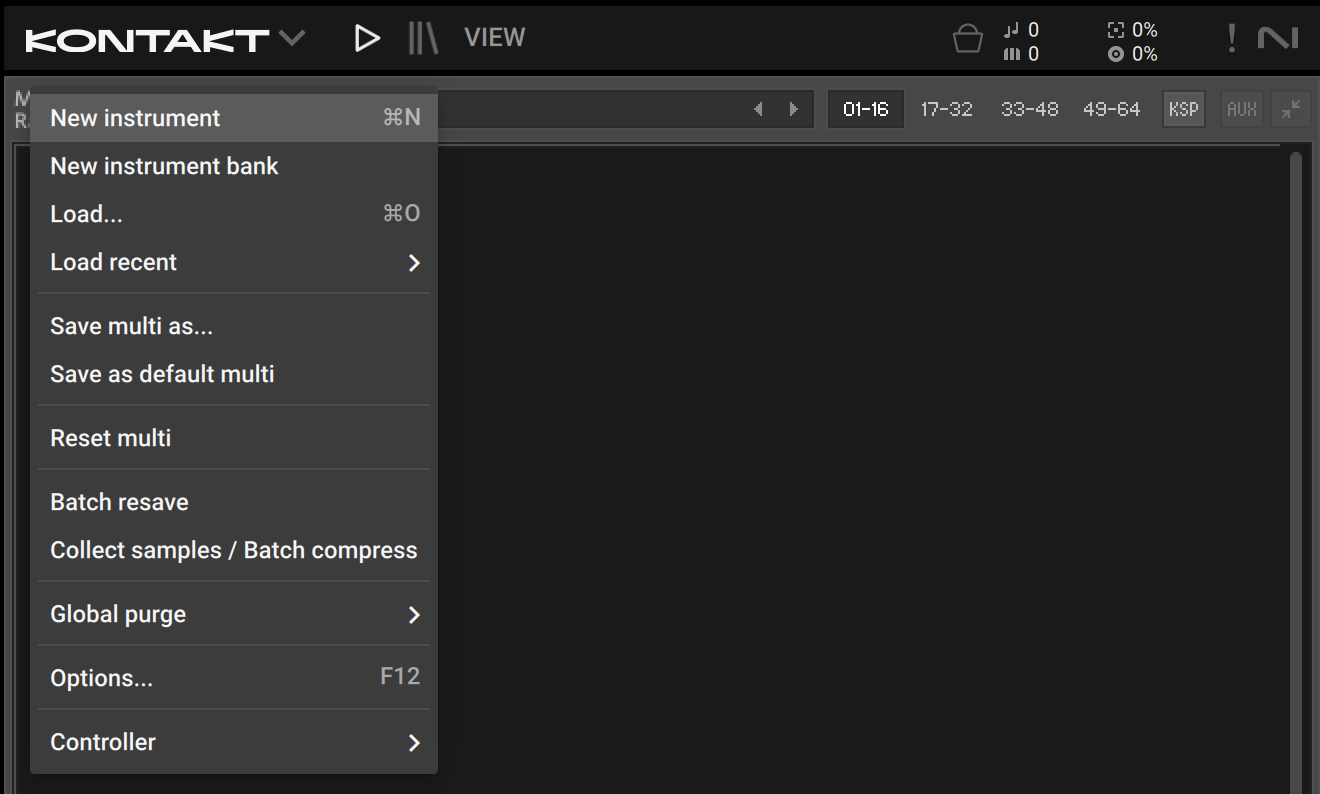
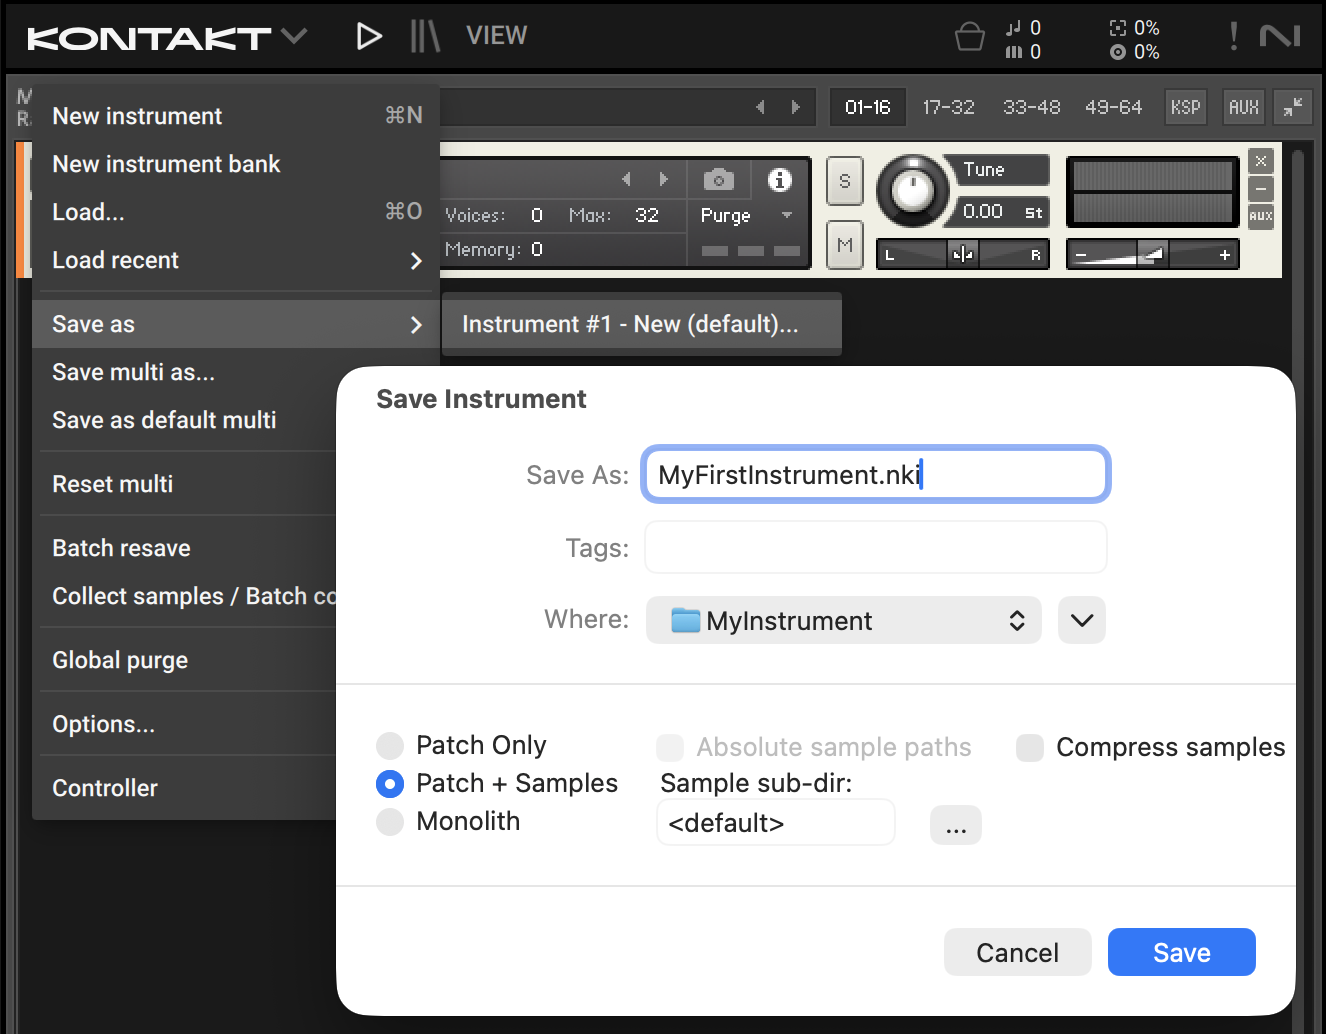
To create an instrument navigate to the Kontakt Header menu, and then click on New Instrument.
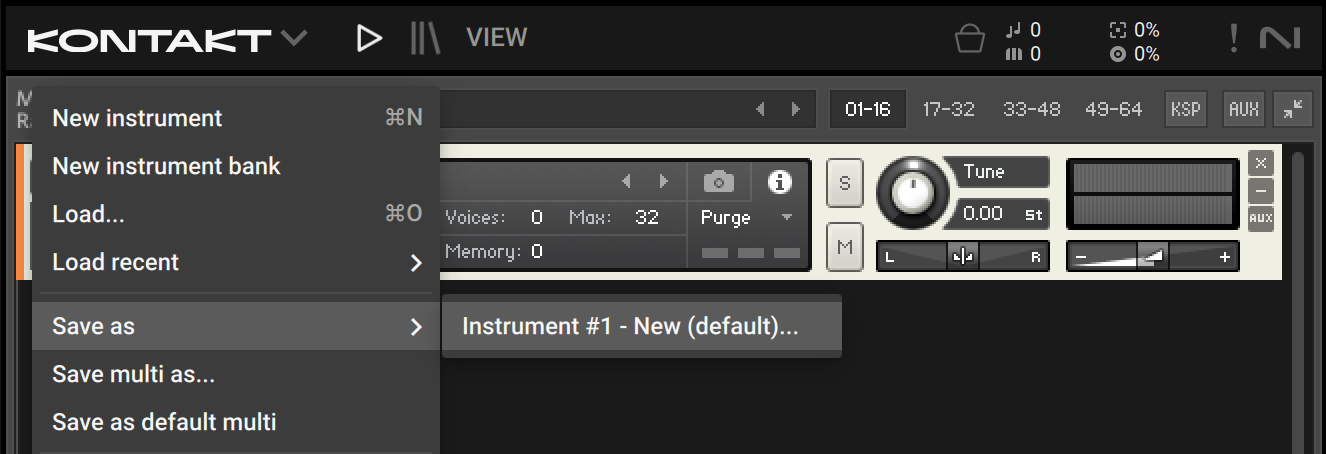
After the instrument is created, save it from Save as.
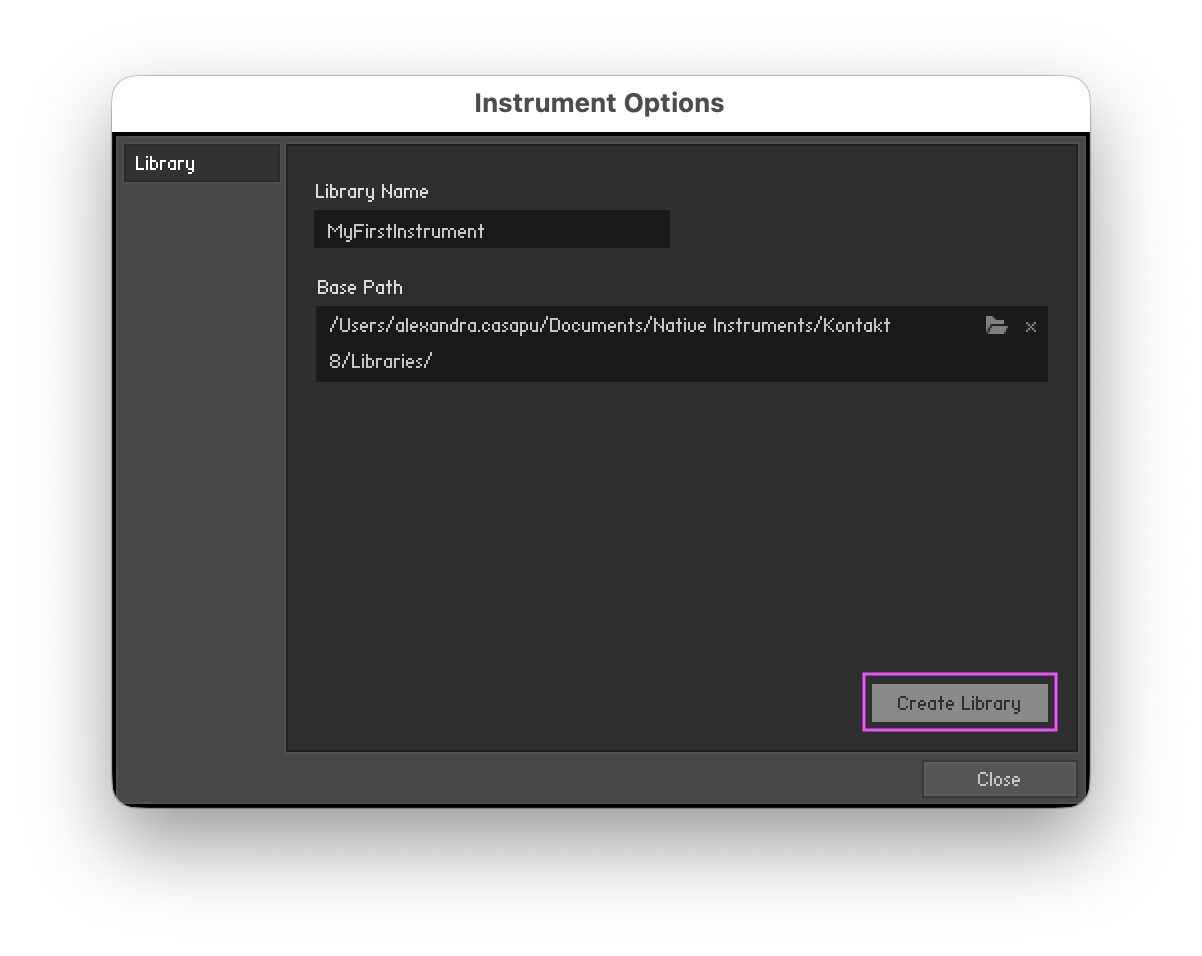
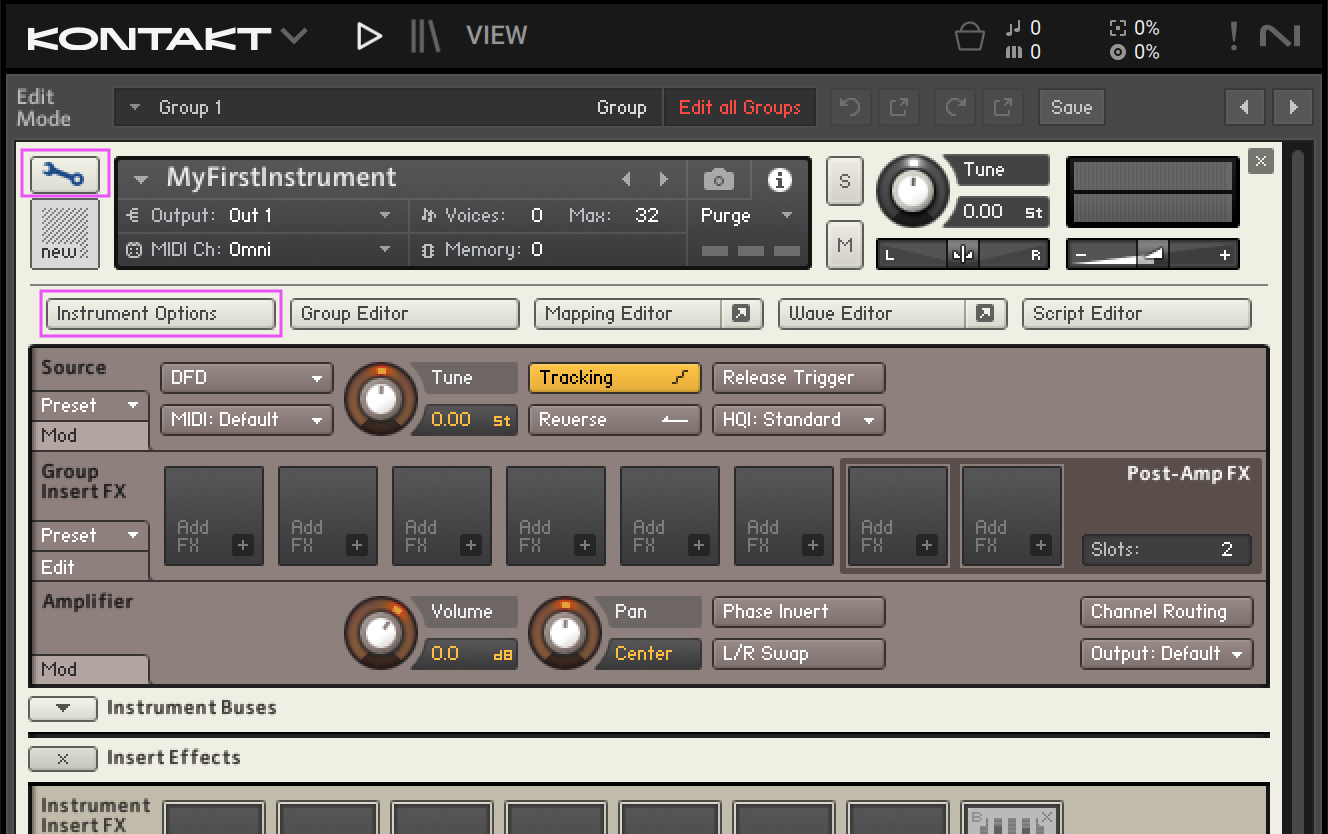
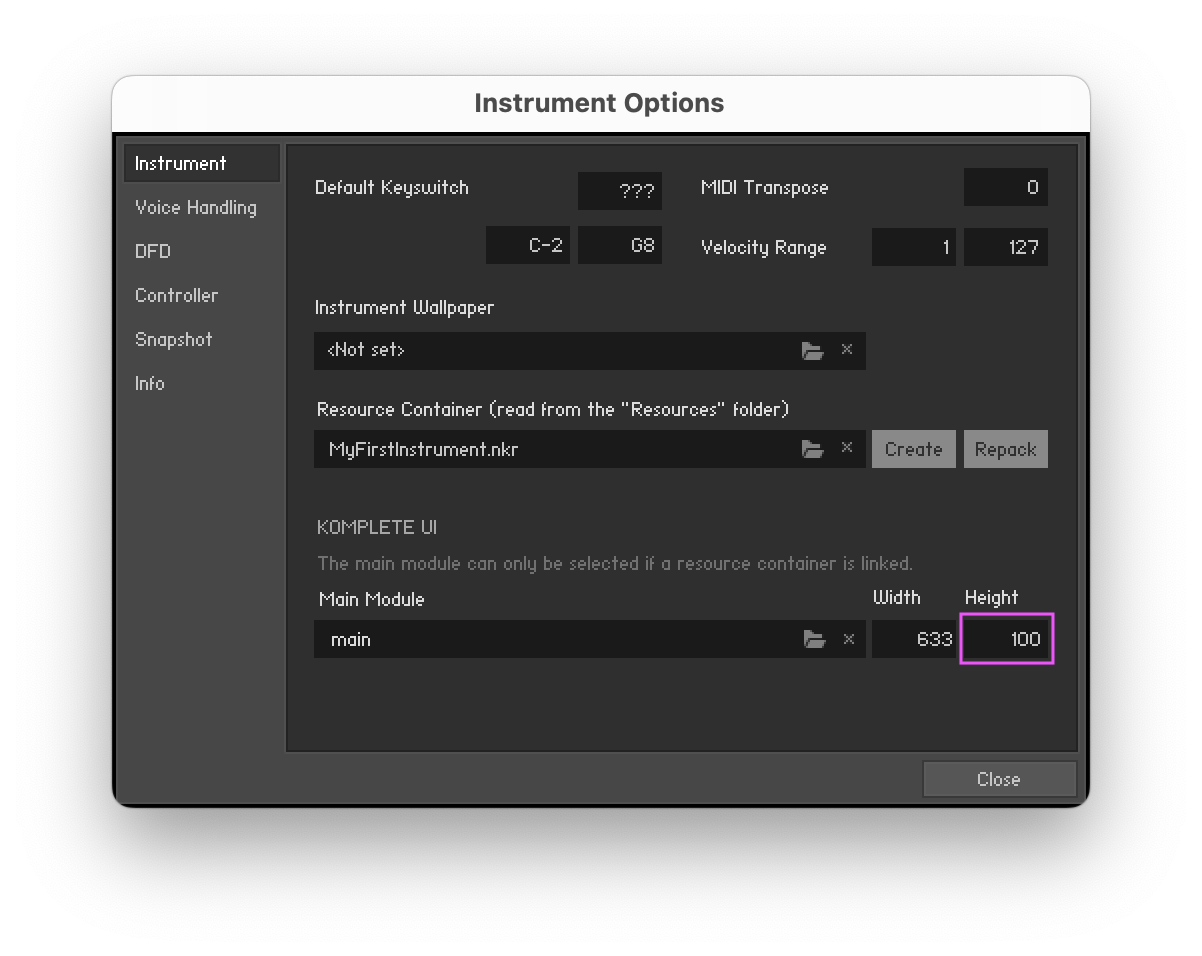
Next you need to create the resource container. To do this, open the instrument editor by clicking on the wrench icon in the top left of the instrument header and then click on Instrument Options.
In the “Instrument” tab click on the “Create” button next to “Resource Container”
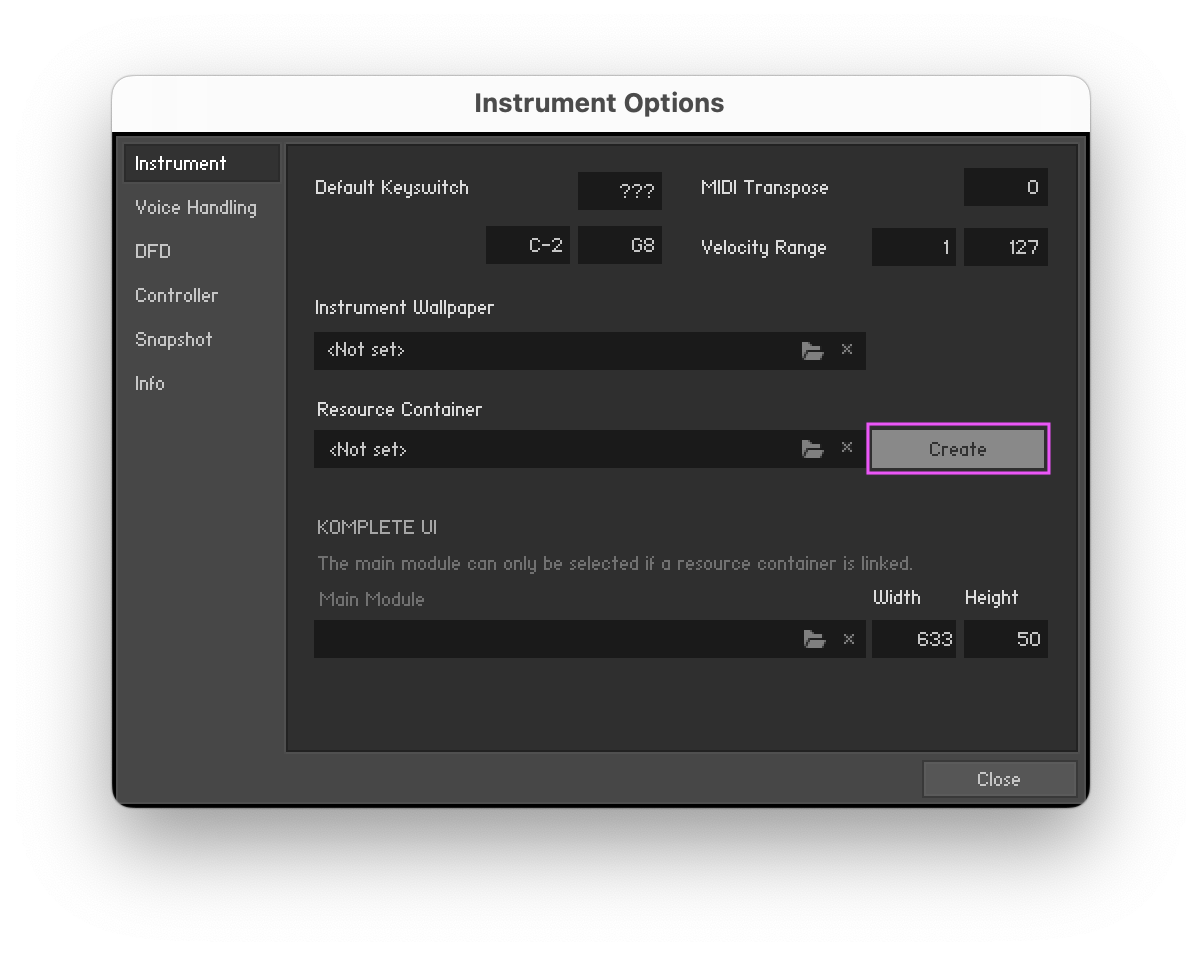
Navigate to the folder where you saved your instrument and save it there.
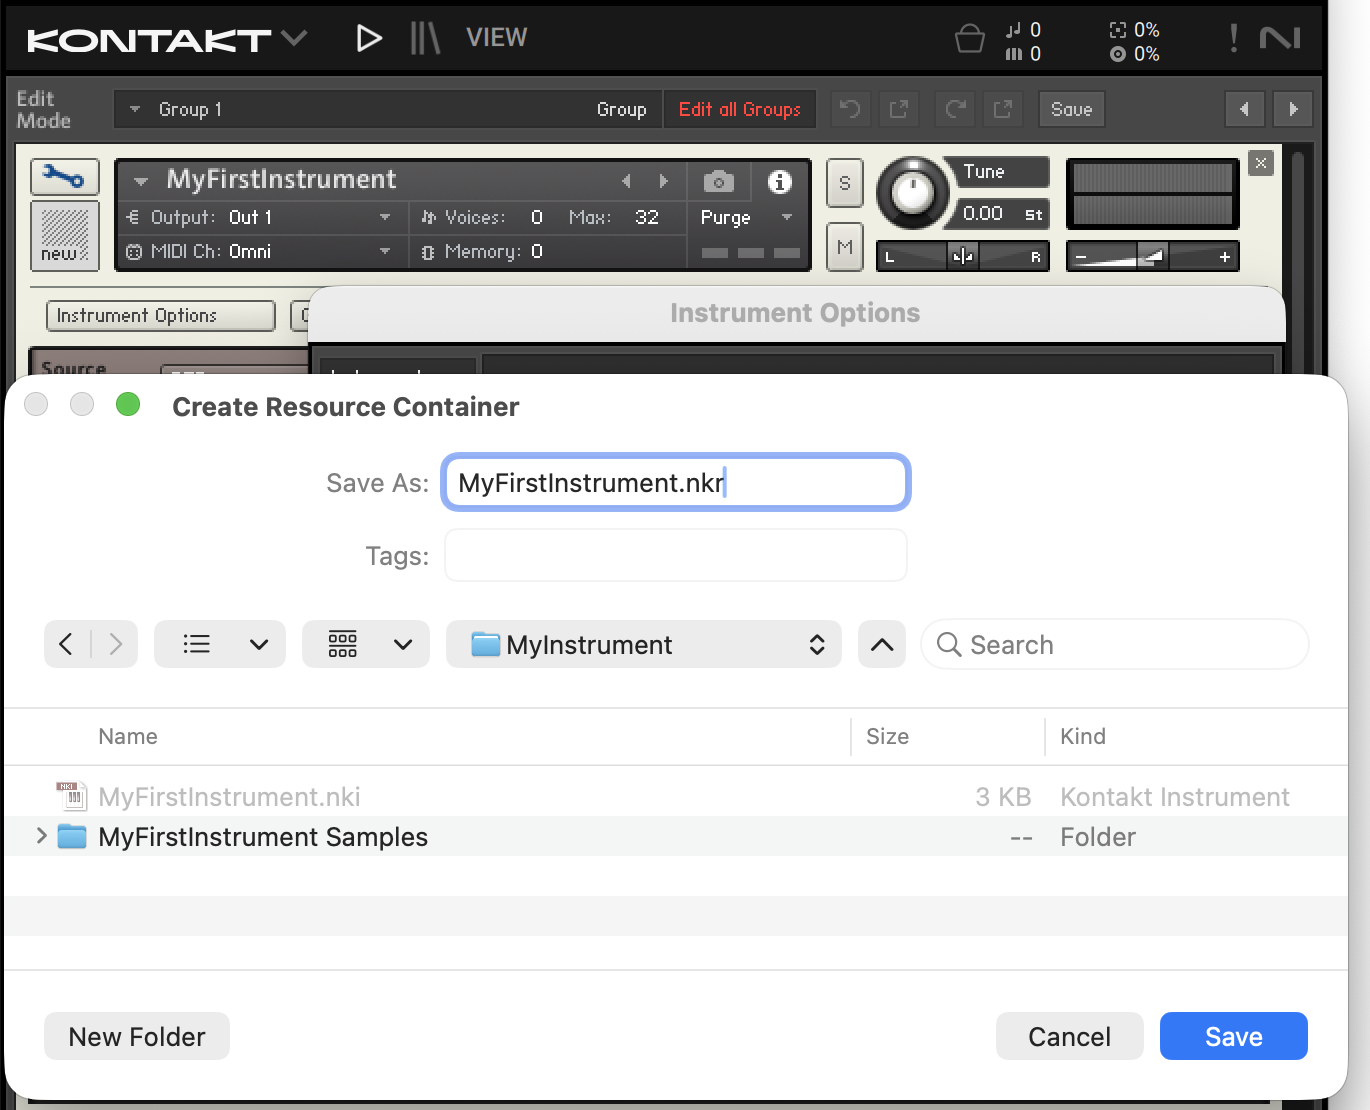
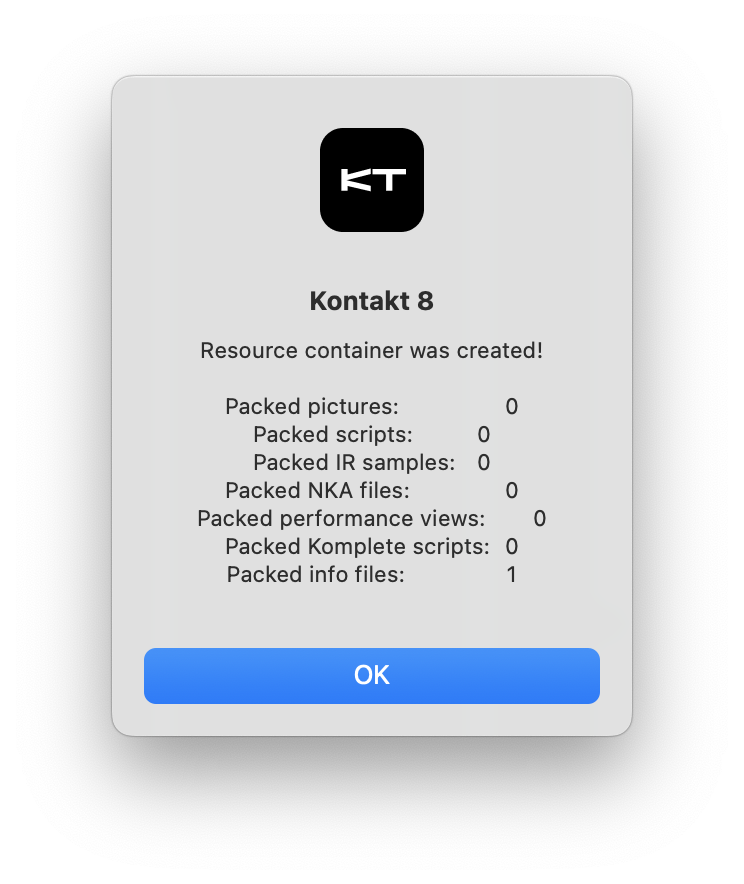
After hitting “Save” a dialog will show up asking us if you want to create the resource folder structure. Click “Yes”.
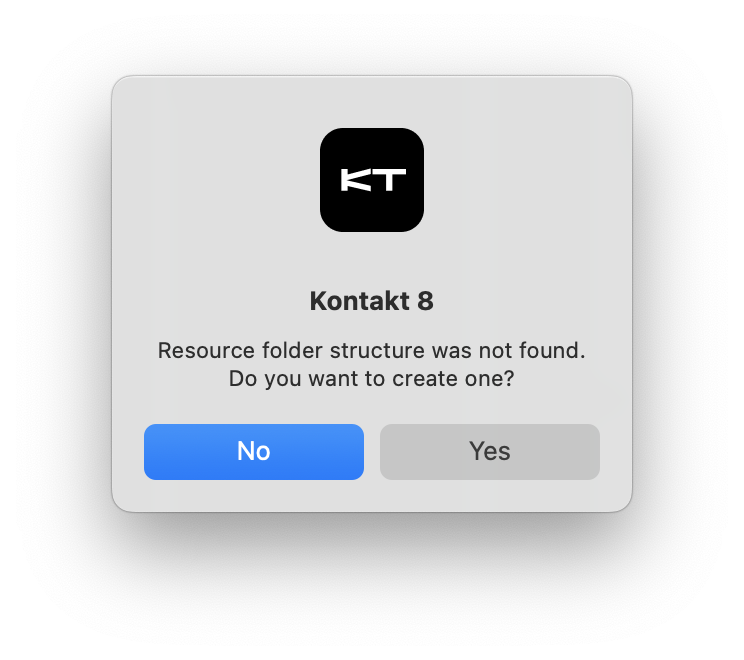
Click “OK” in the confirmation dialog.
Add the Main Komplete UI Module
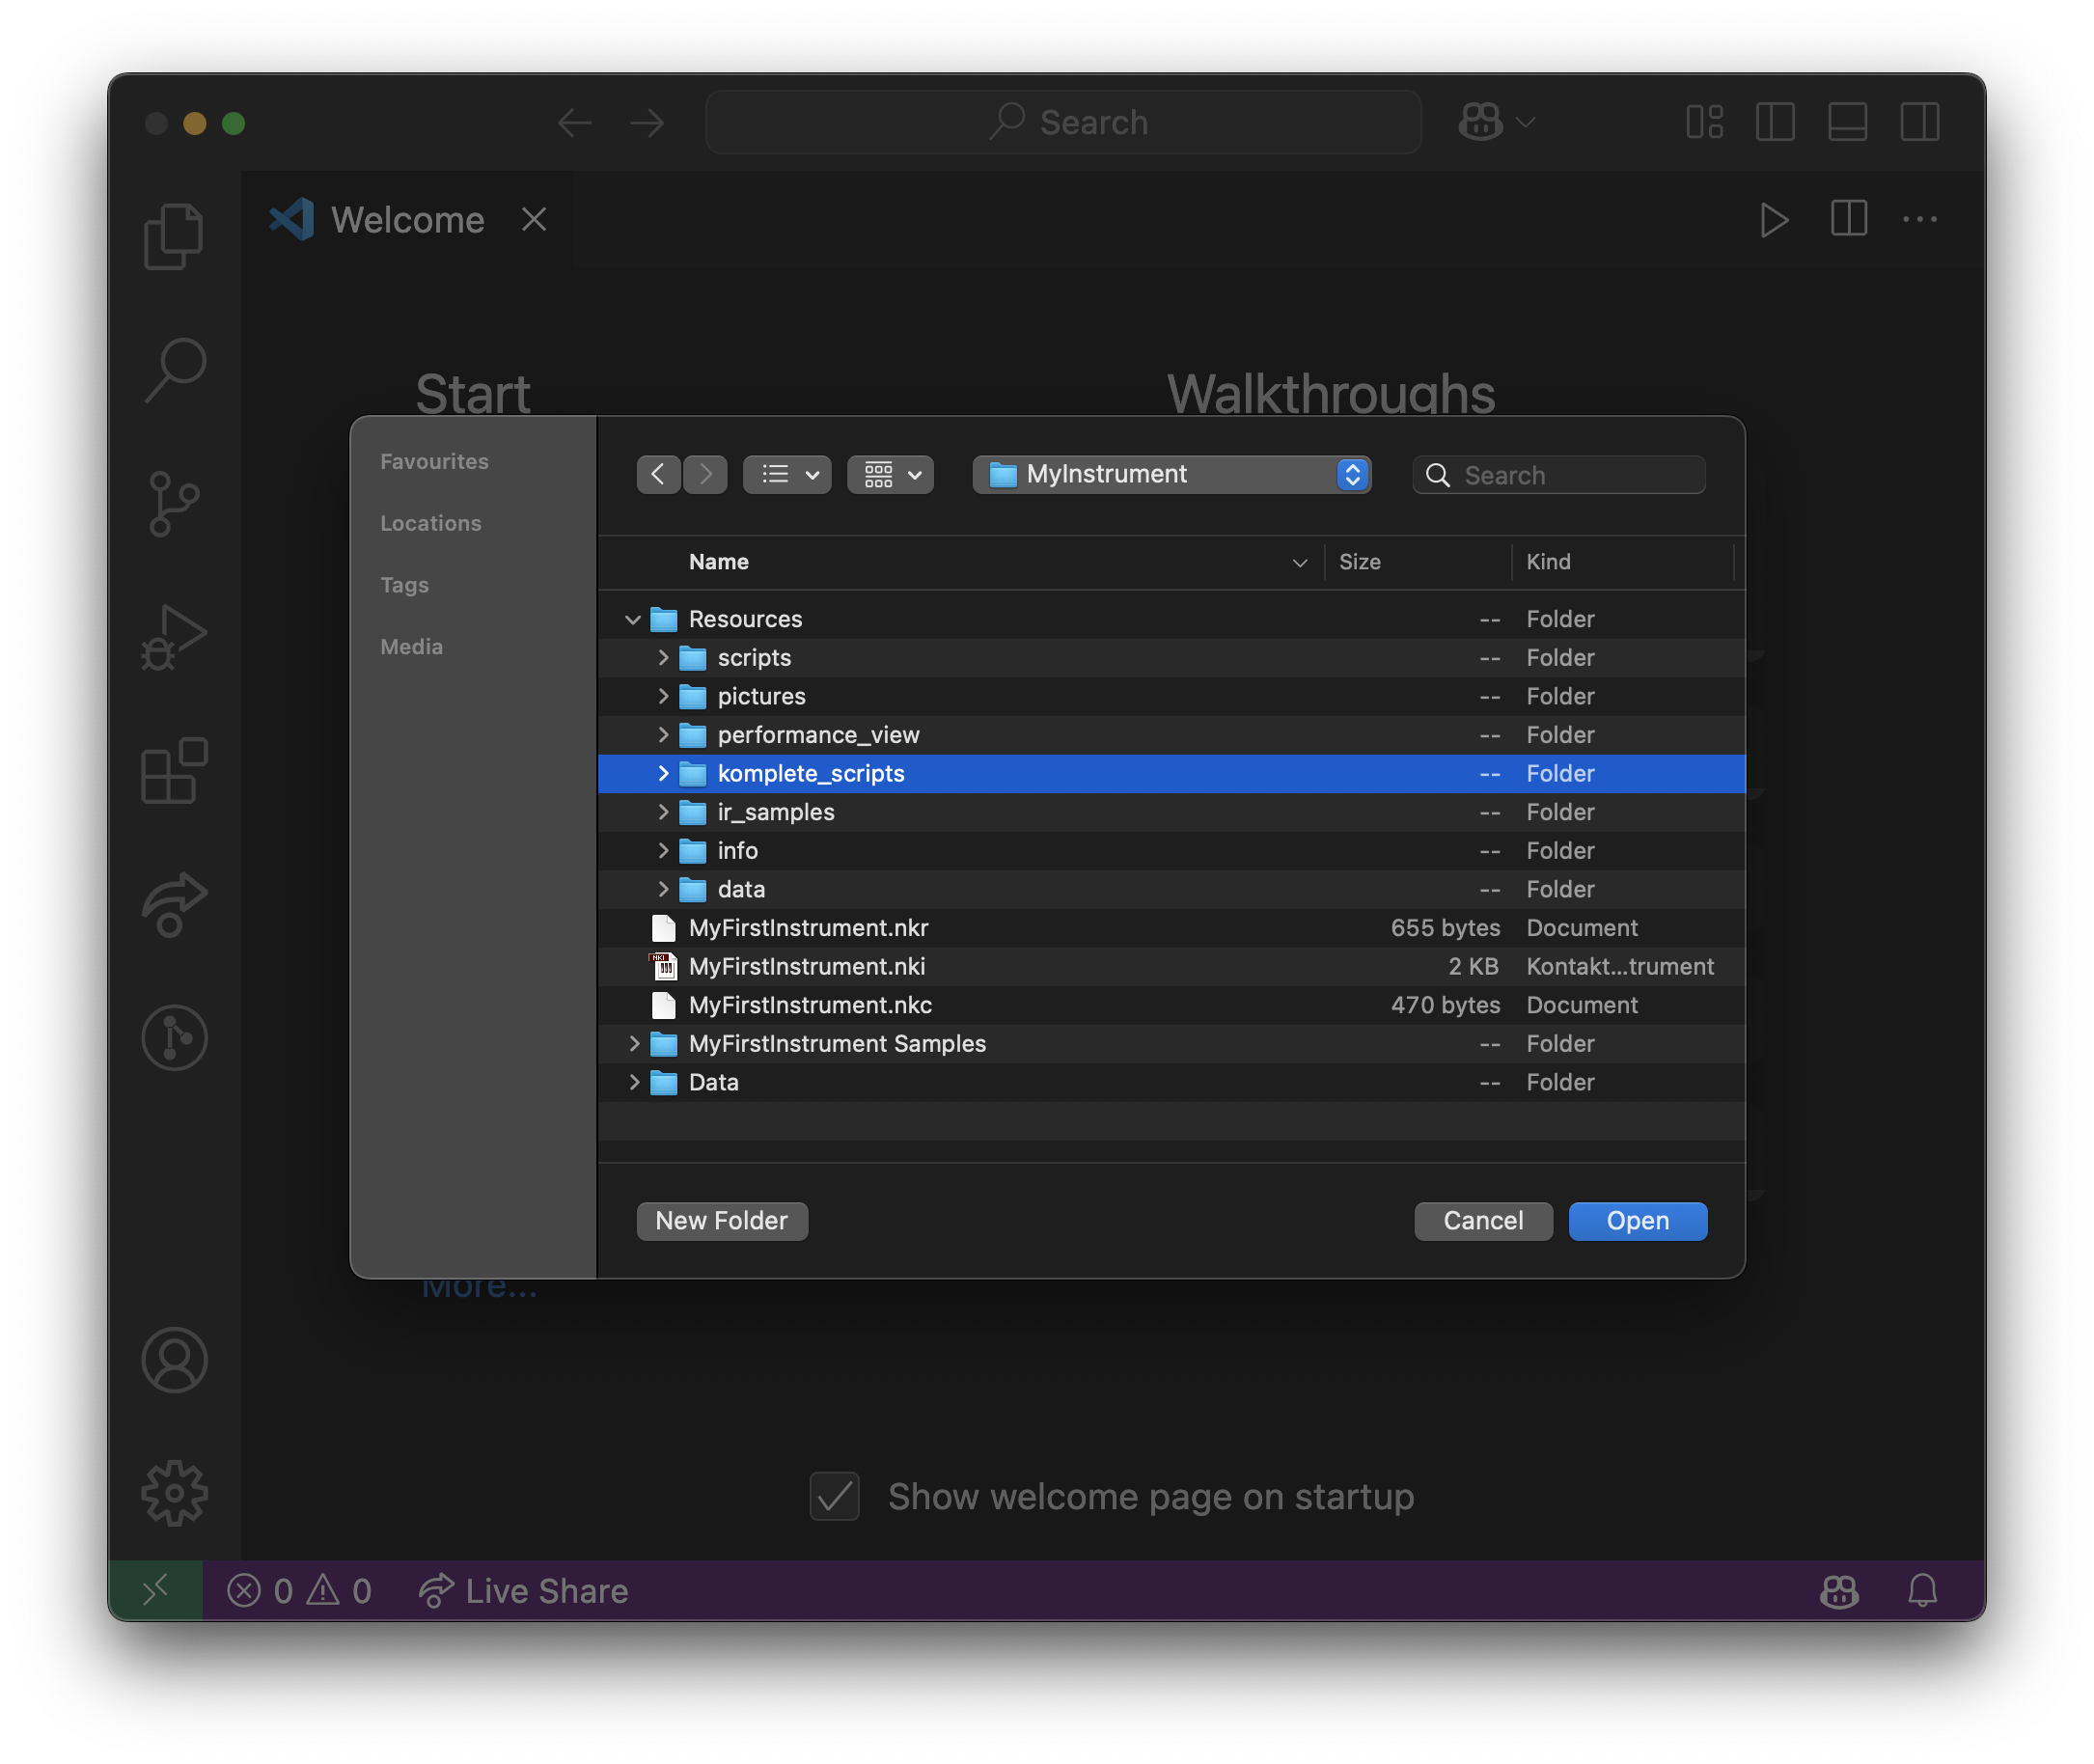
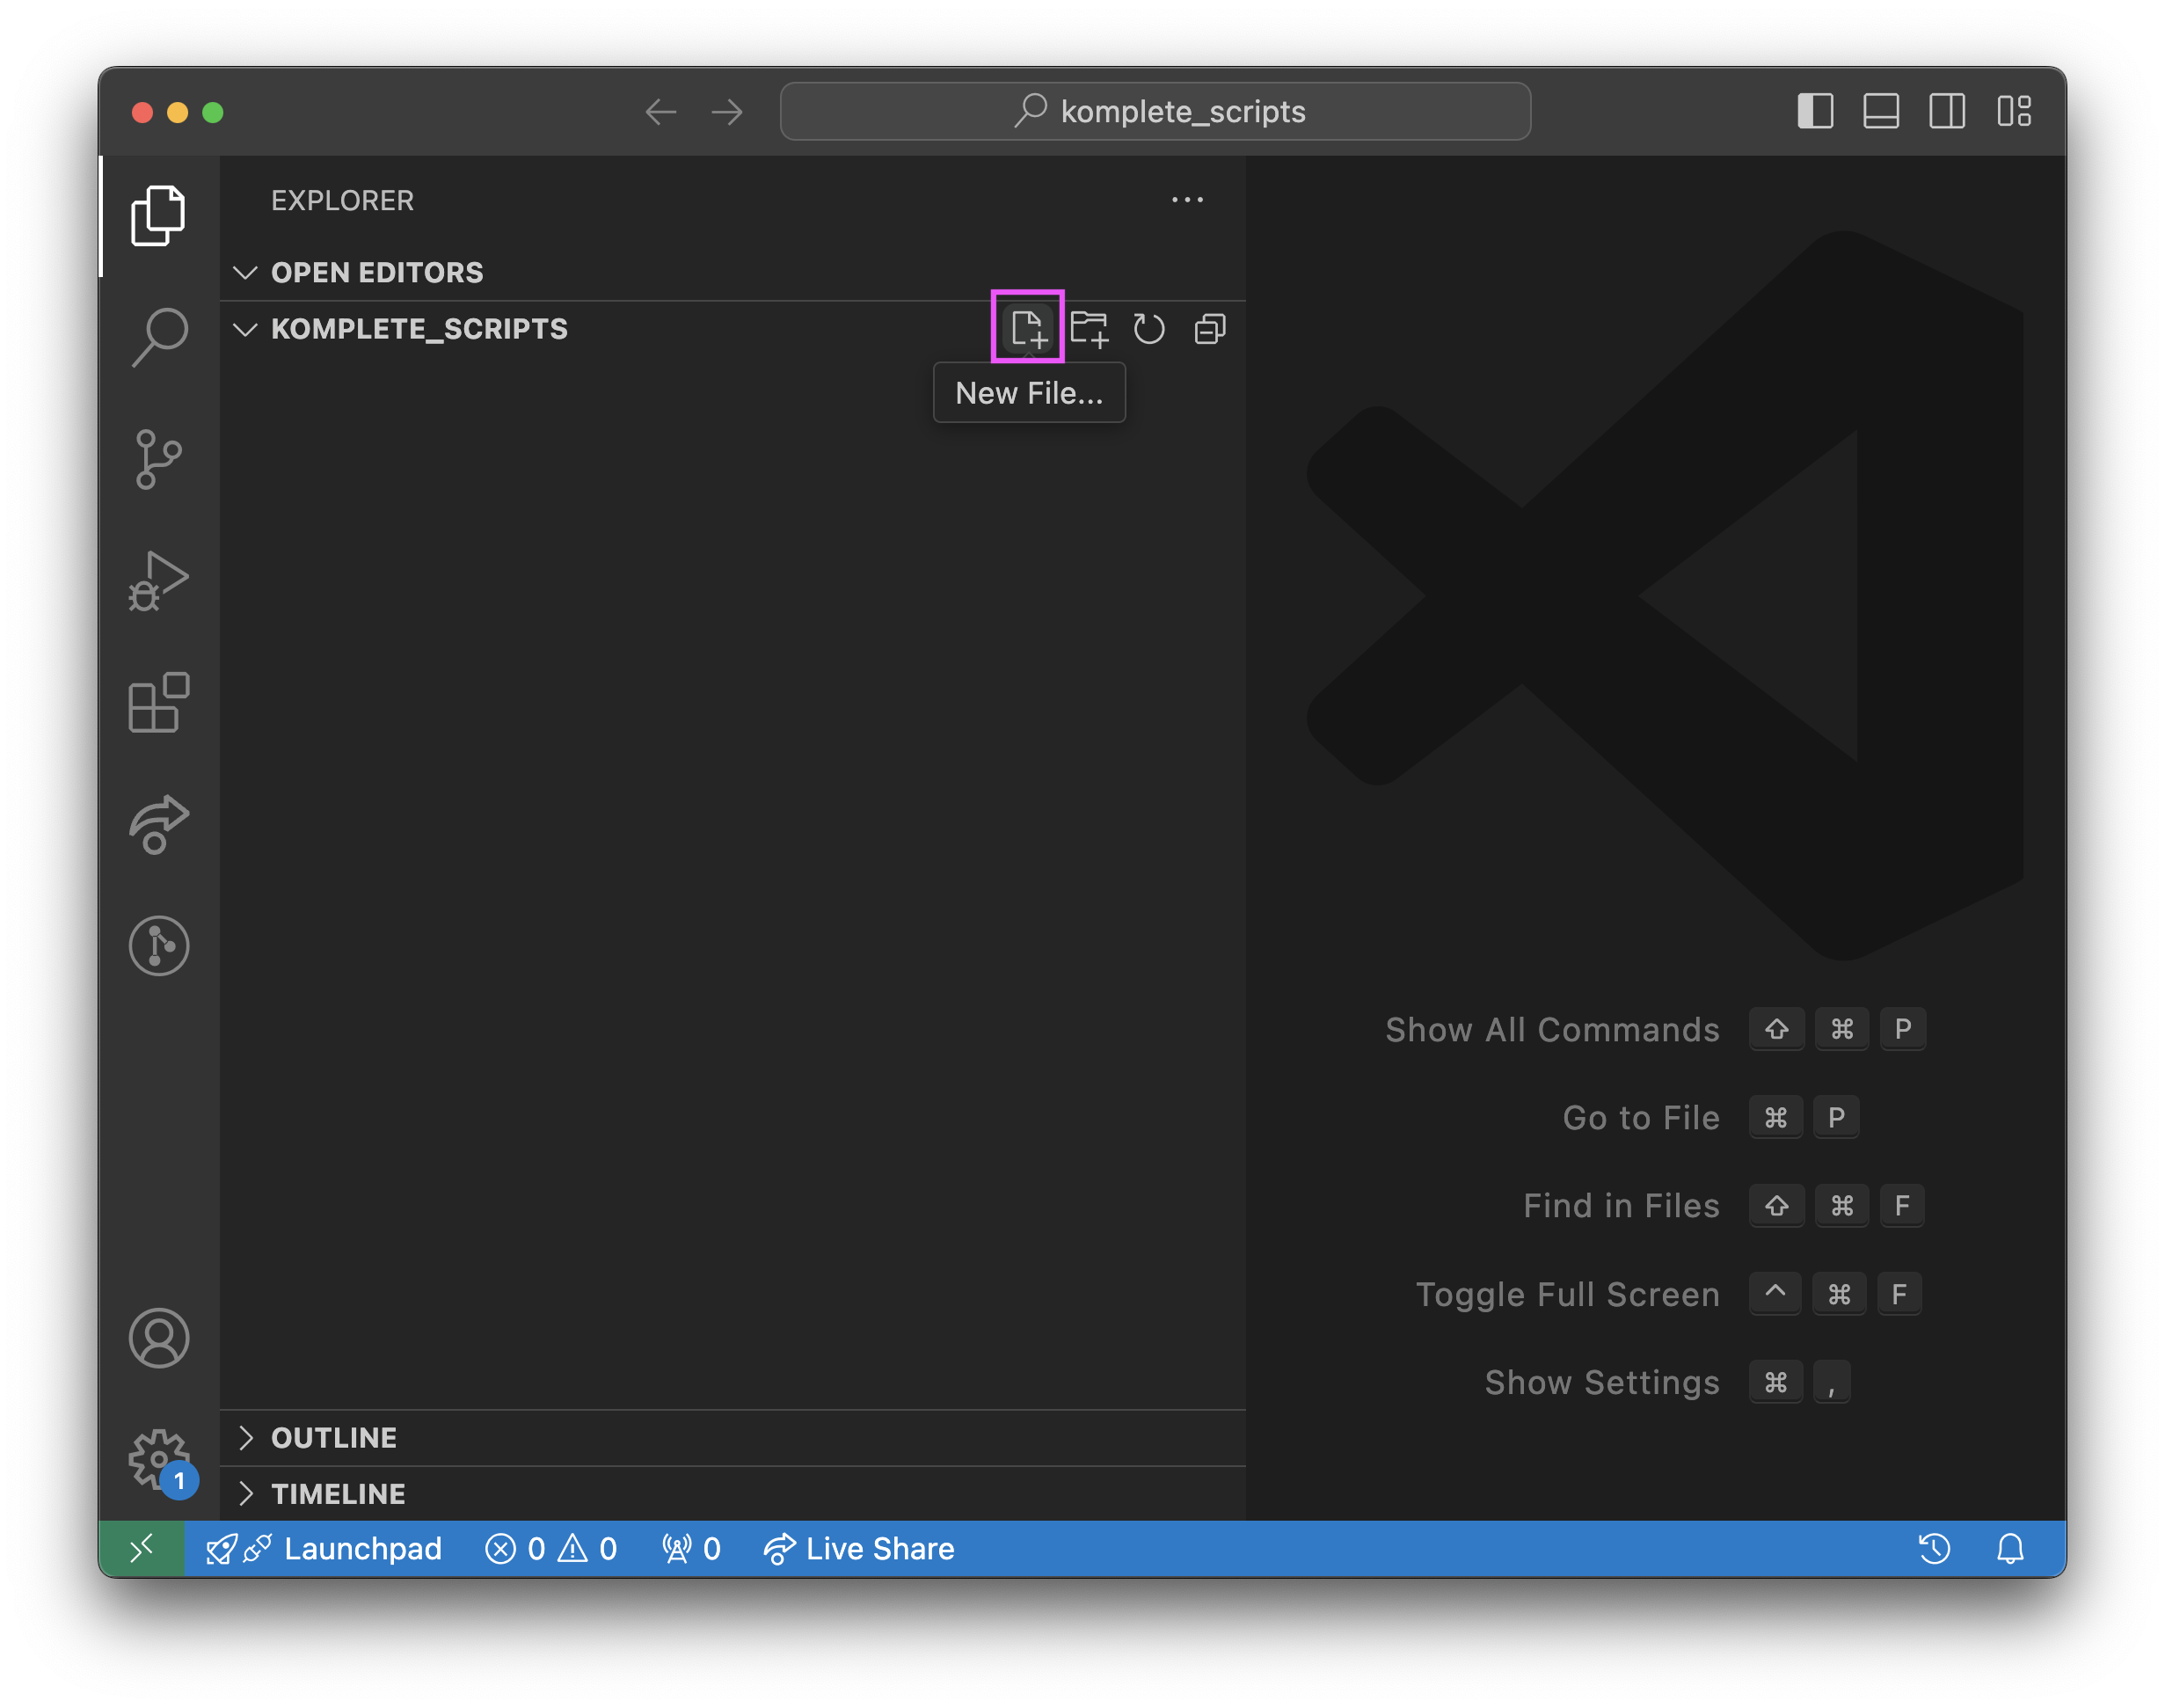
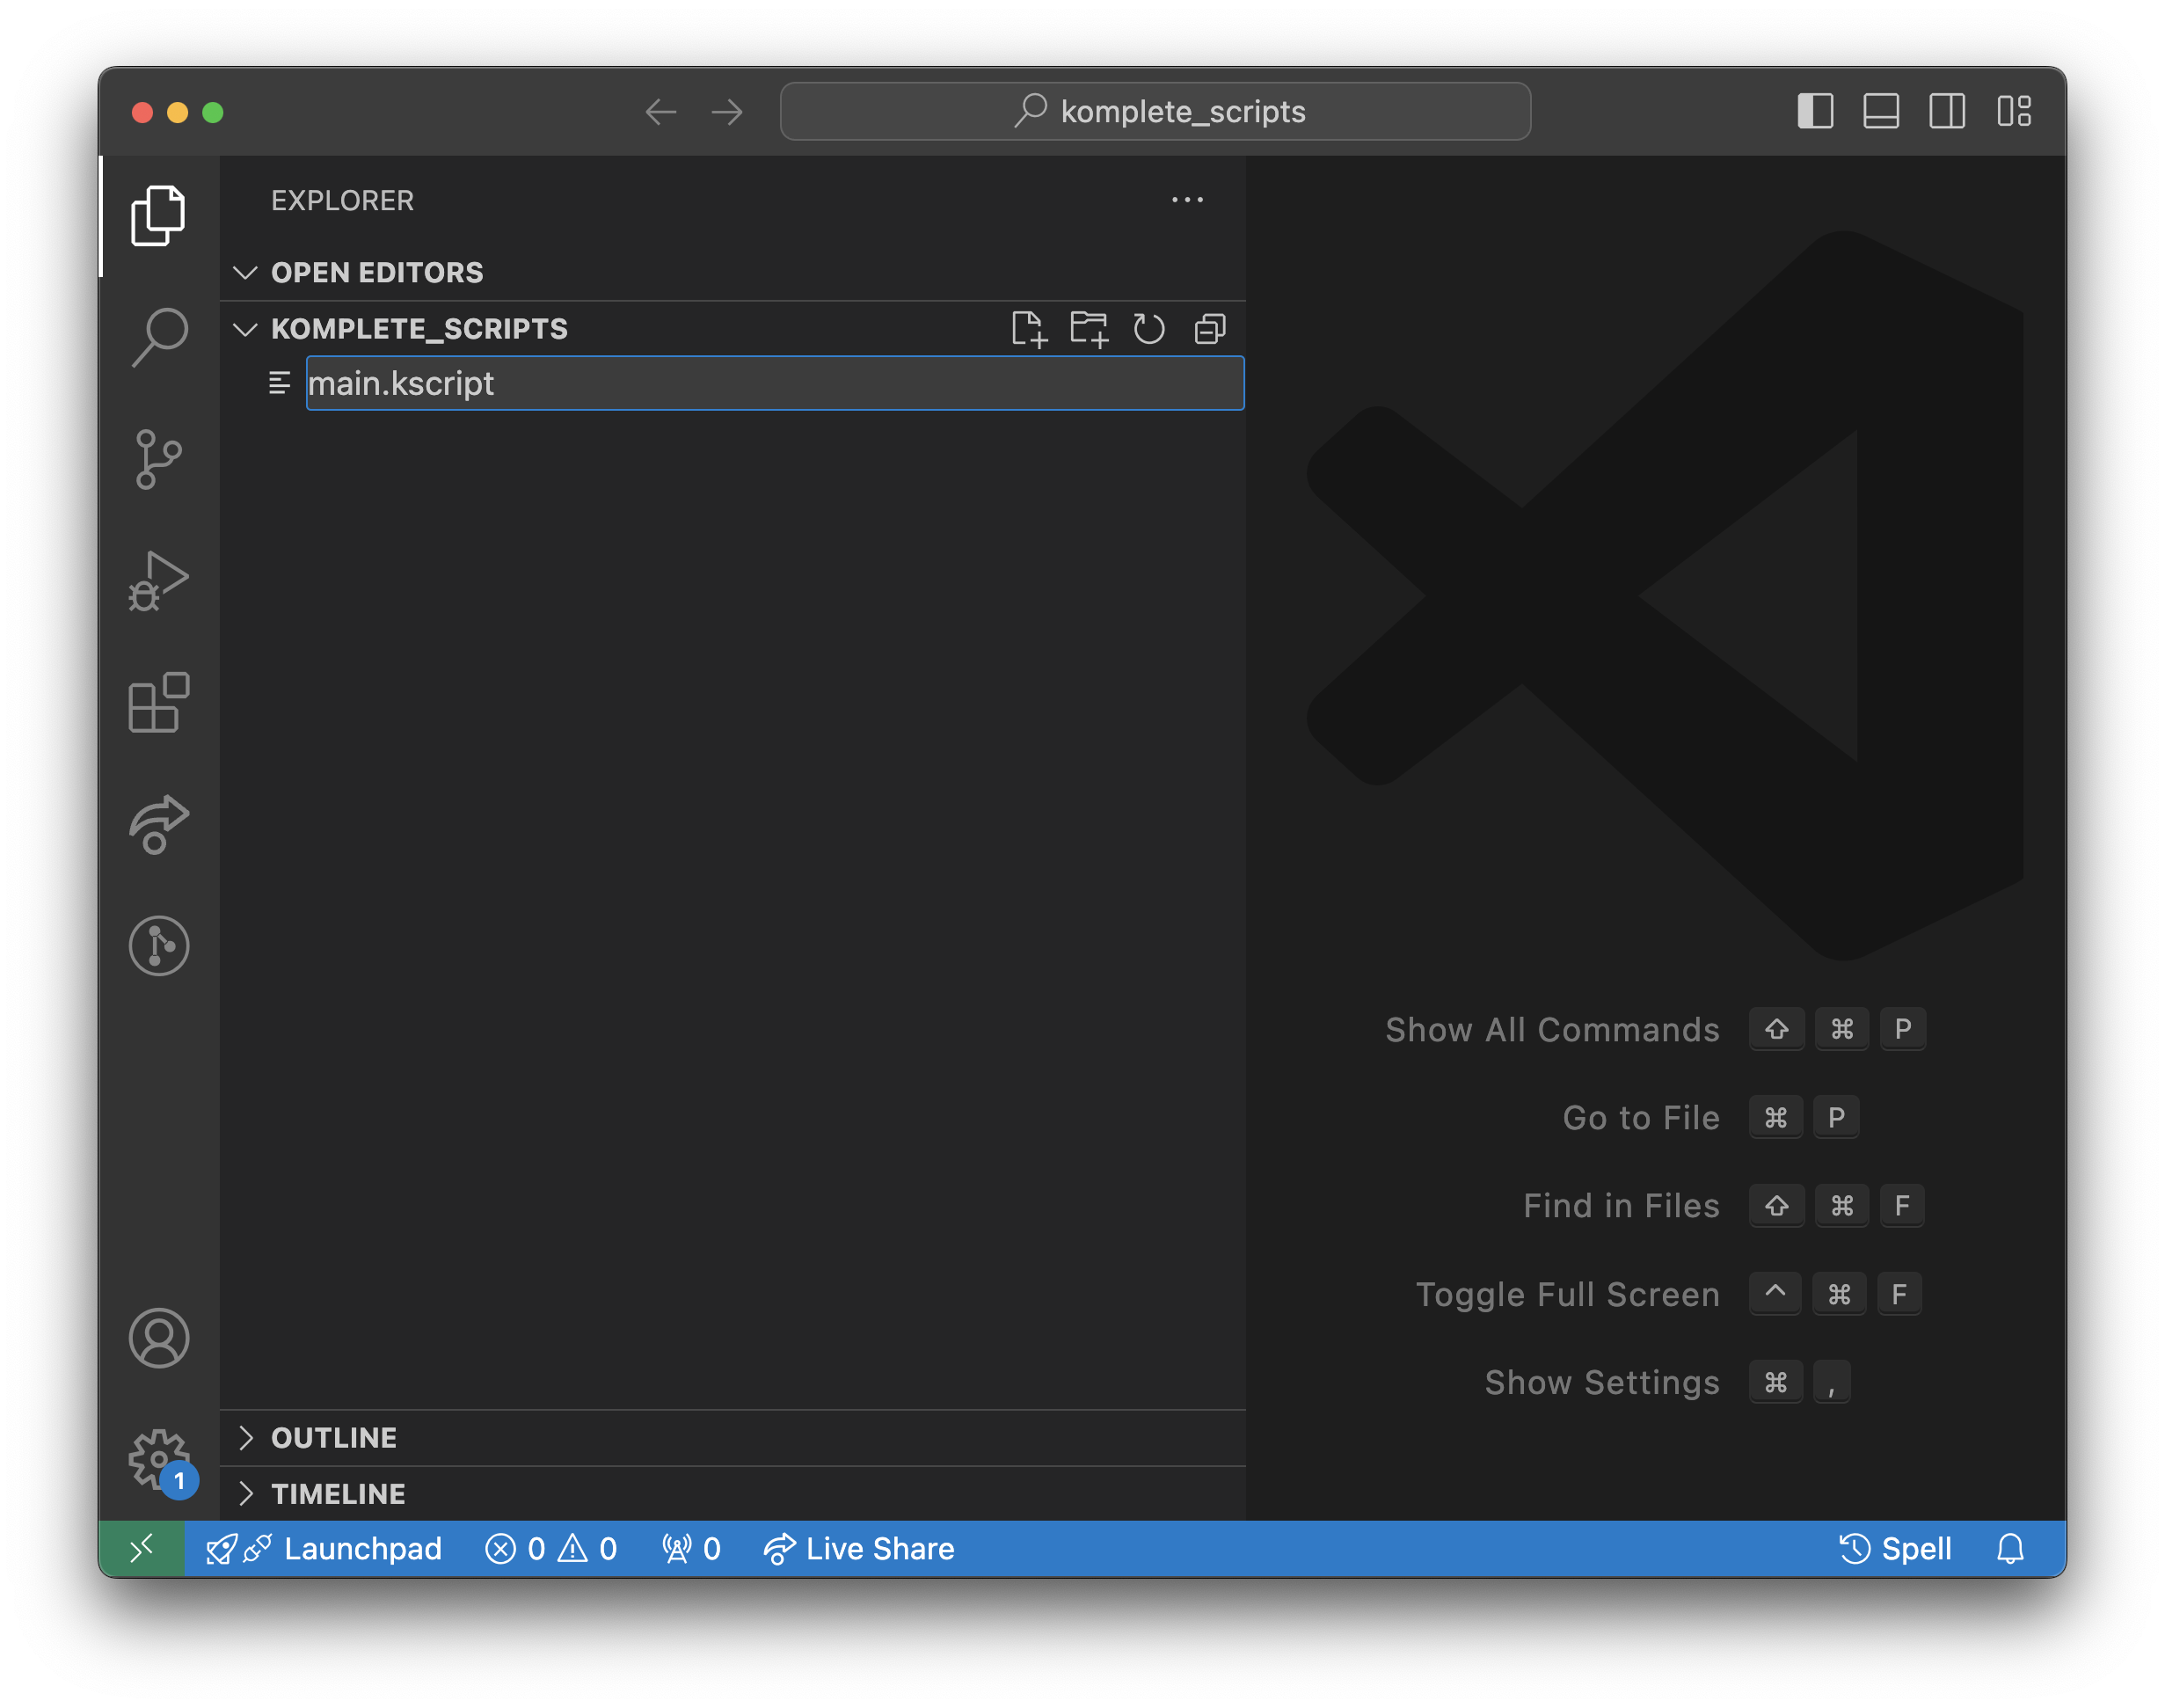
In order to add a Komplete UI user interface, create your main.kscript file (called a module). All .kscript files need to be within the komplete_scripts folder inside the resource container. Launch VSCode and open the komplete_scripts folder.

Then create the main.kscript module.
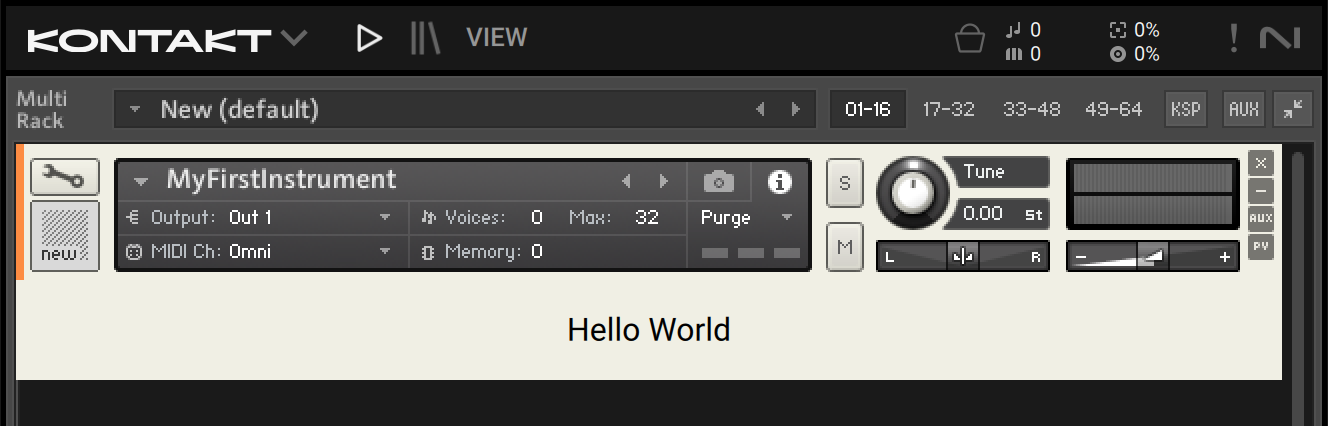
To display some basic text in the UI you need to import the Text component from the ui module and export the main component:
import { Text } from ui

export var main = Text("Hello World")
Make sure to save the file.
Configure Komplete UI
Go back to the Instrument Options dialog in Kontakt. In the KOMPLETE UI section you can adjust the instrument width and height at any time, as well as set the main module. Now that you created your main Komplete UI module, click on the file selector to load it.
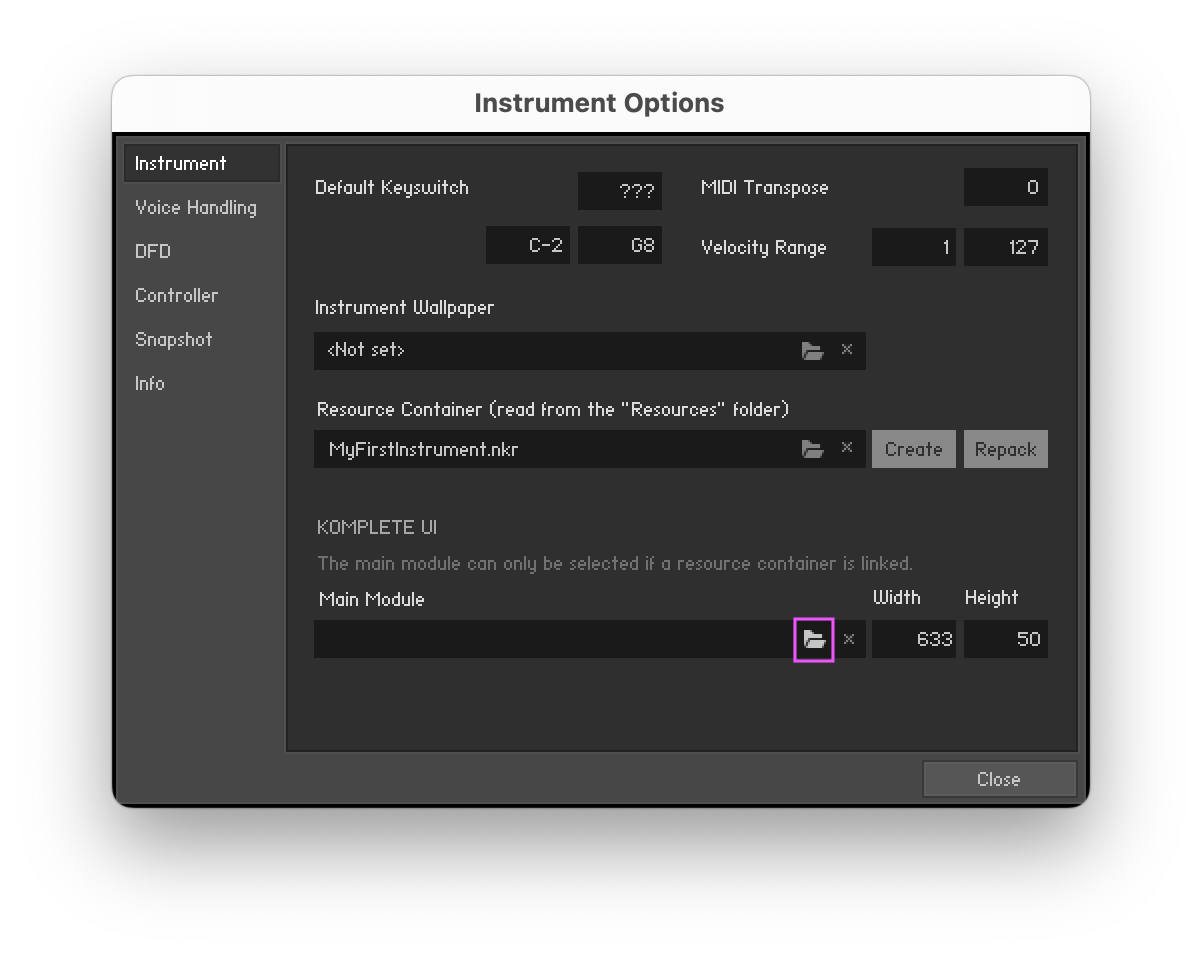
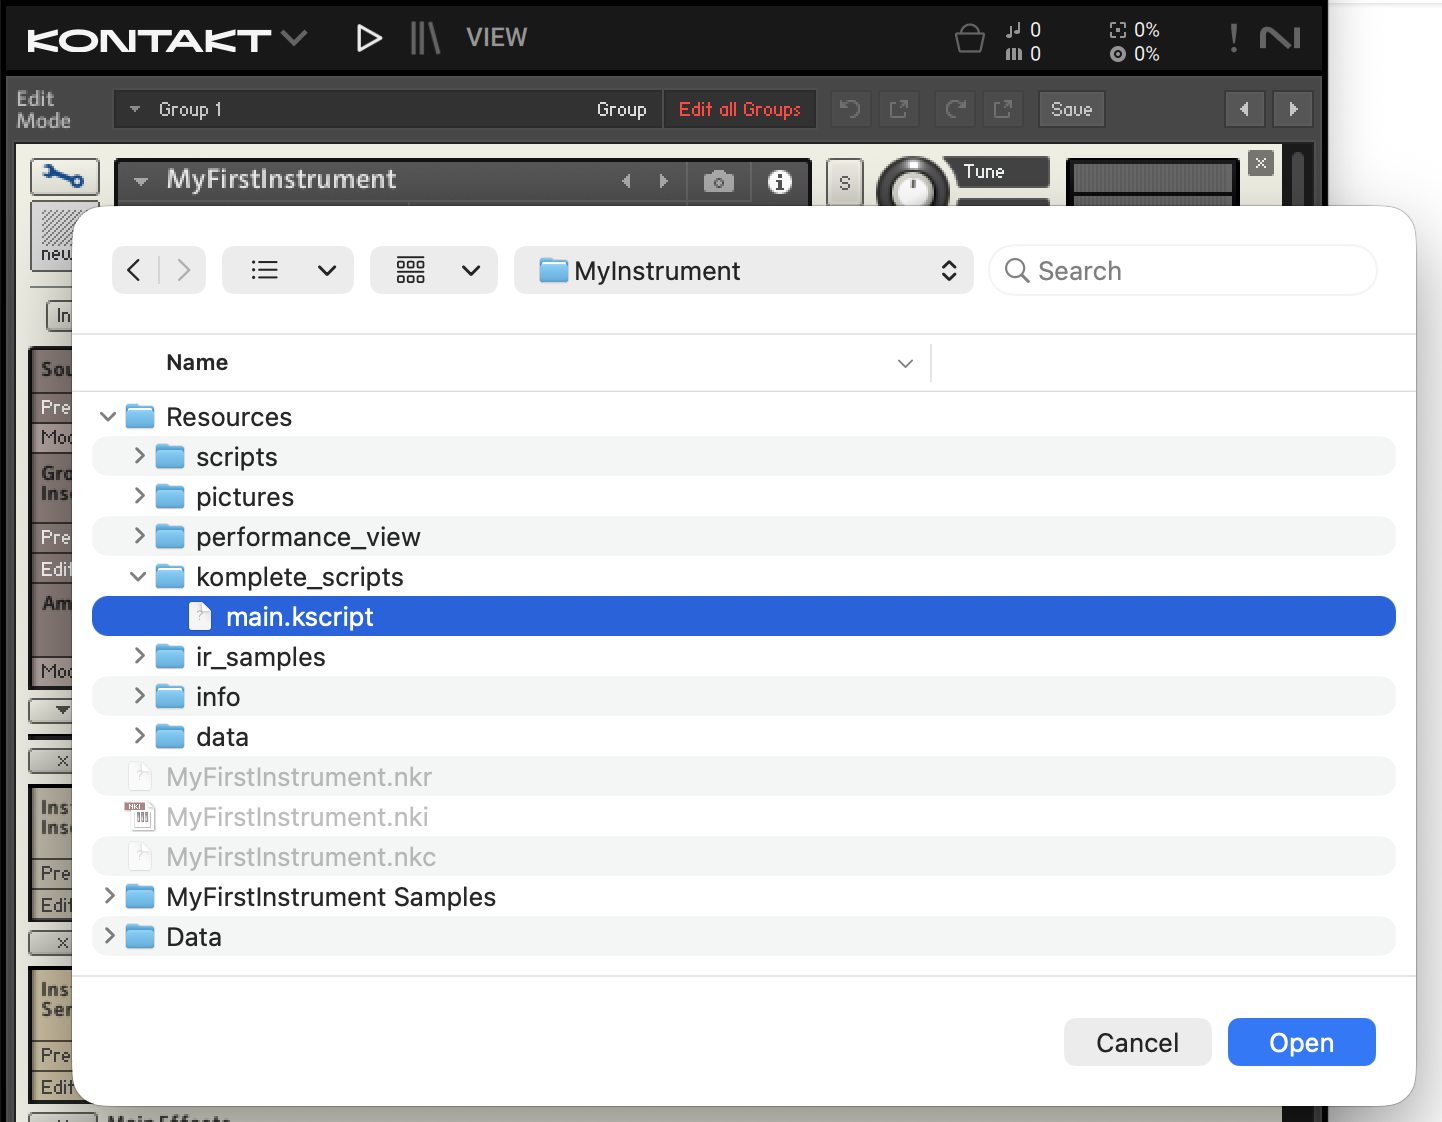
Select the module file you just created.
Leave the edit mode by clicking on the wrench icon. Now you can see your the user interface showing the text “Hello World.”
Connect Komplete UI to KSP UI Controls
Until now you have only added a UI to your instrument, but you also want to exchange state between Komplete UI and KSP in order to make it a full instrument. At the moment, this is done by connecting to a KSP UI control. Let's start by adding to the instrument a simple slider and an associated label.
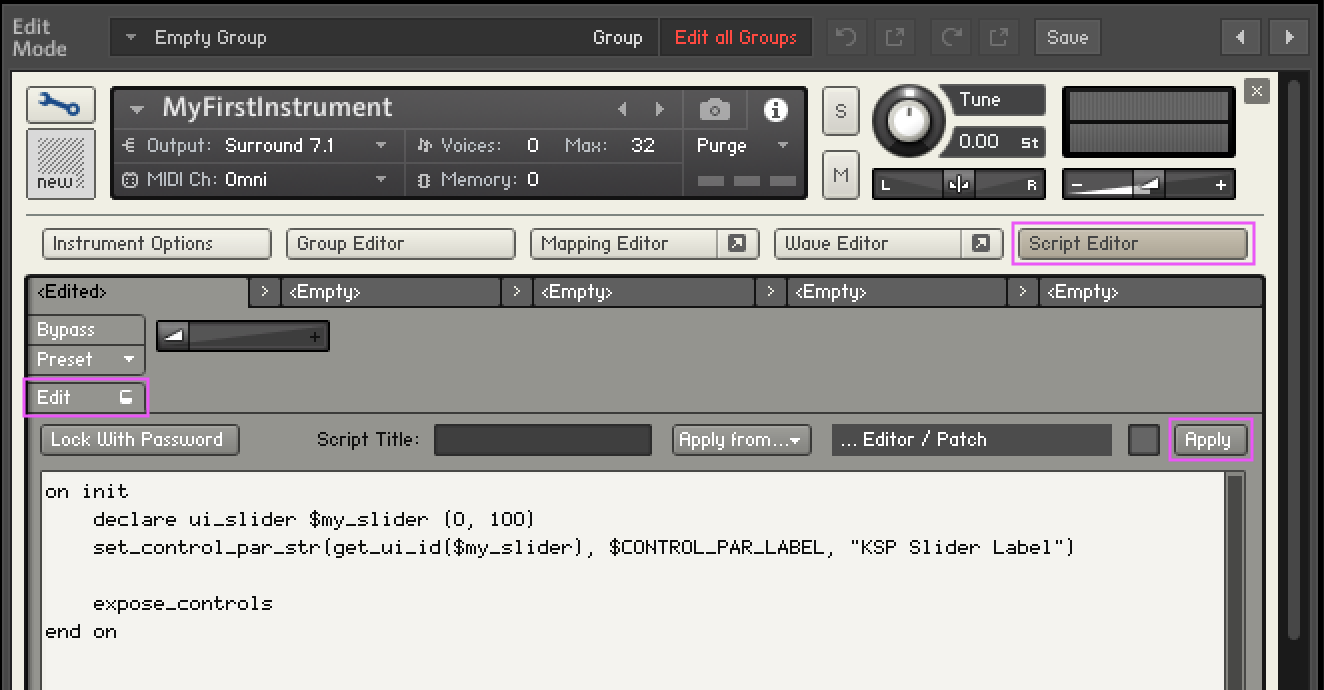
In Kontakt click on the “Script Editor” tab and then on “Edit”. Paste the following content into the new script, which declares the KSP slider and makes it accessible from Komplete UI through the call to expose_controls. Then click "Apply".
on init
    declare ui_slider $my_slider (0, 100)
    set_control_par_str(get_ui_id($my_slider), $CONTROL_PAR_LABEL, "KSP Slider Label")

    expose_controls
end on
Now, let's replace the Text with a Slider and connect it on the Komplete UI side. For this tutorial you're going to use the Slider component of the Kontakt Controls Package. It makes connecting easy and only requires us to give it the ID of the KSP UI control and a label.
Make sure to copy the package folder to the komplete_scripts folder of your instrument. By doing that you ensure that your instrument is built against a specific version of the package. The resulting folder structure should look like this:
- your-instrument.nki
- Resources/
|-   komplete_scripts/
|    |-   main.kscript
|    |-   kontakt_controls/
|    |    |- ...
|- ...
- ...
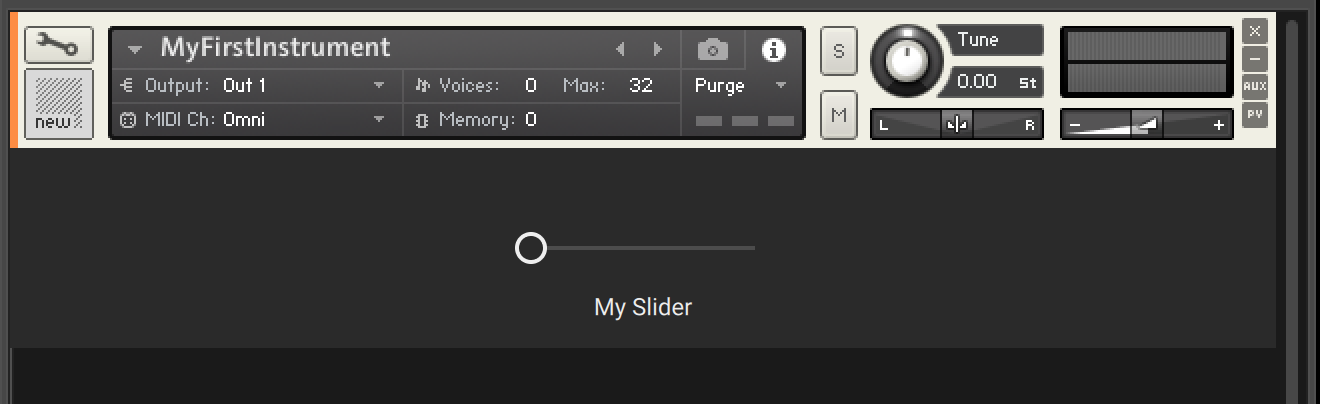
Now you can import the Slider component from the package into your main.kscript file (make sure to use the id that you assigned to the slider in the KSP script):
import { ZStack, Rectangle } from ui
import * from kontakt_controls

export var main =  ZStack {
    // Background
    Rectangle(color: Color(0xFF2A2A2A))

    // Control
    Slider(
        control_id: "my_slider",
        label: "My Slider",
    )
}
In the Instrument Options dialog, set the instrument height to 100 to make sure the slider and its label fit.
If you reload your instrument in Kontakt now, you should see that the Komplete UI slider and the KSP slider are connected. The slider should respect the min and max value of the KSP control.
Please refer to the Kontakt Controls Package documentation for a detailed description of the available controls.
Debugging
With Creator Tools
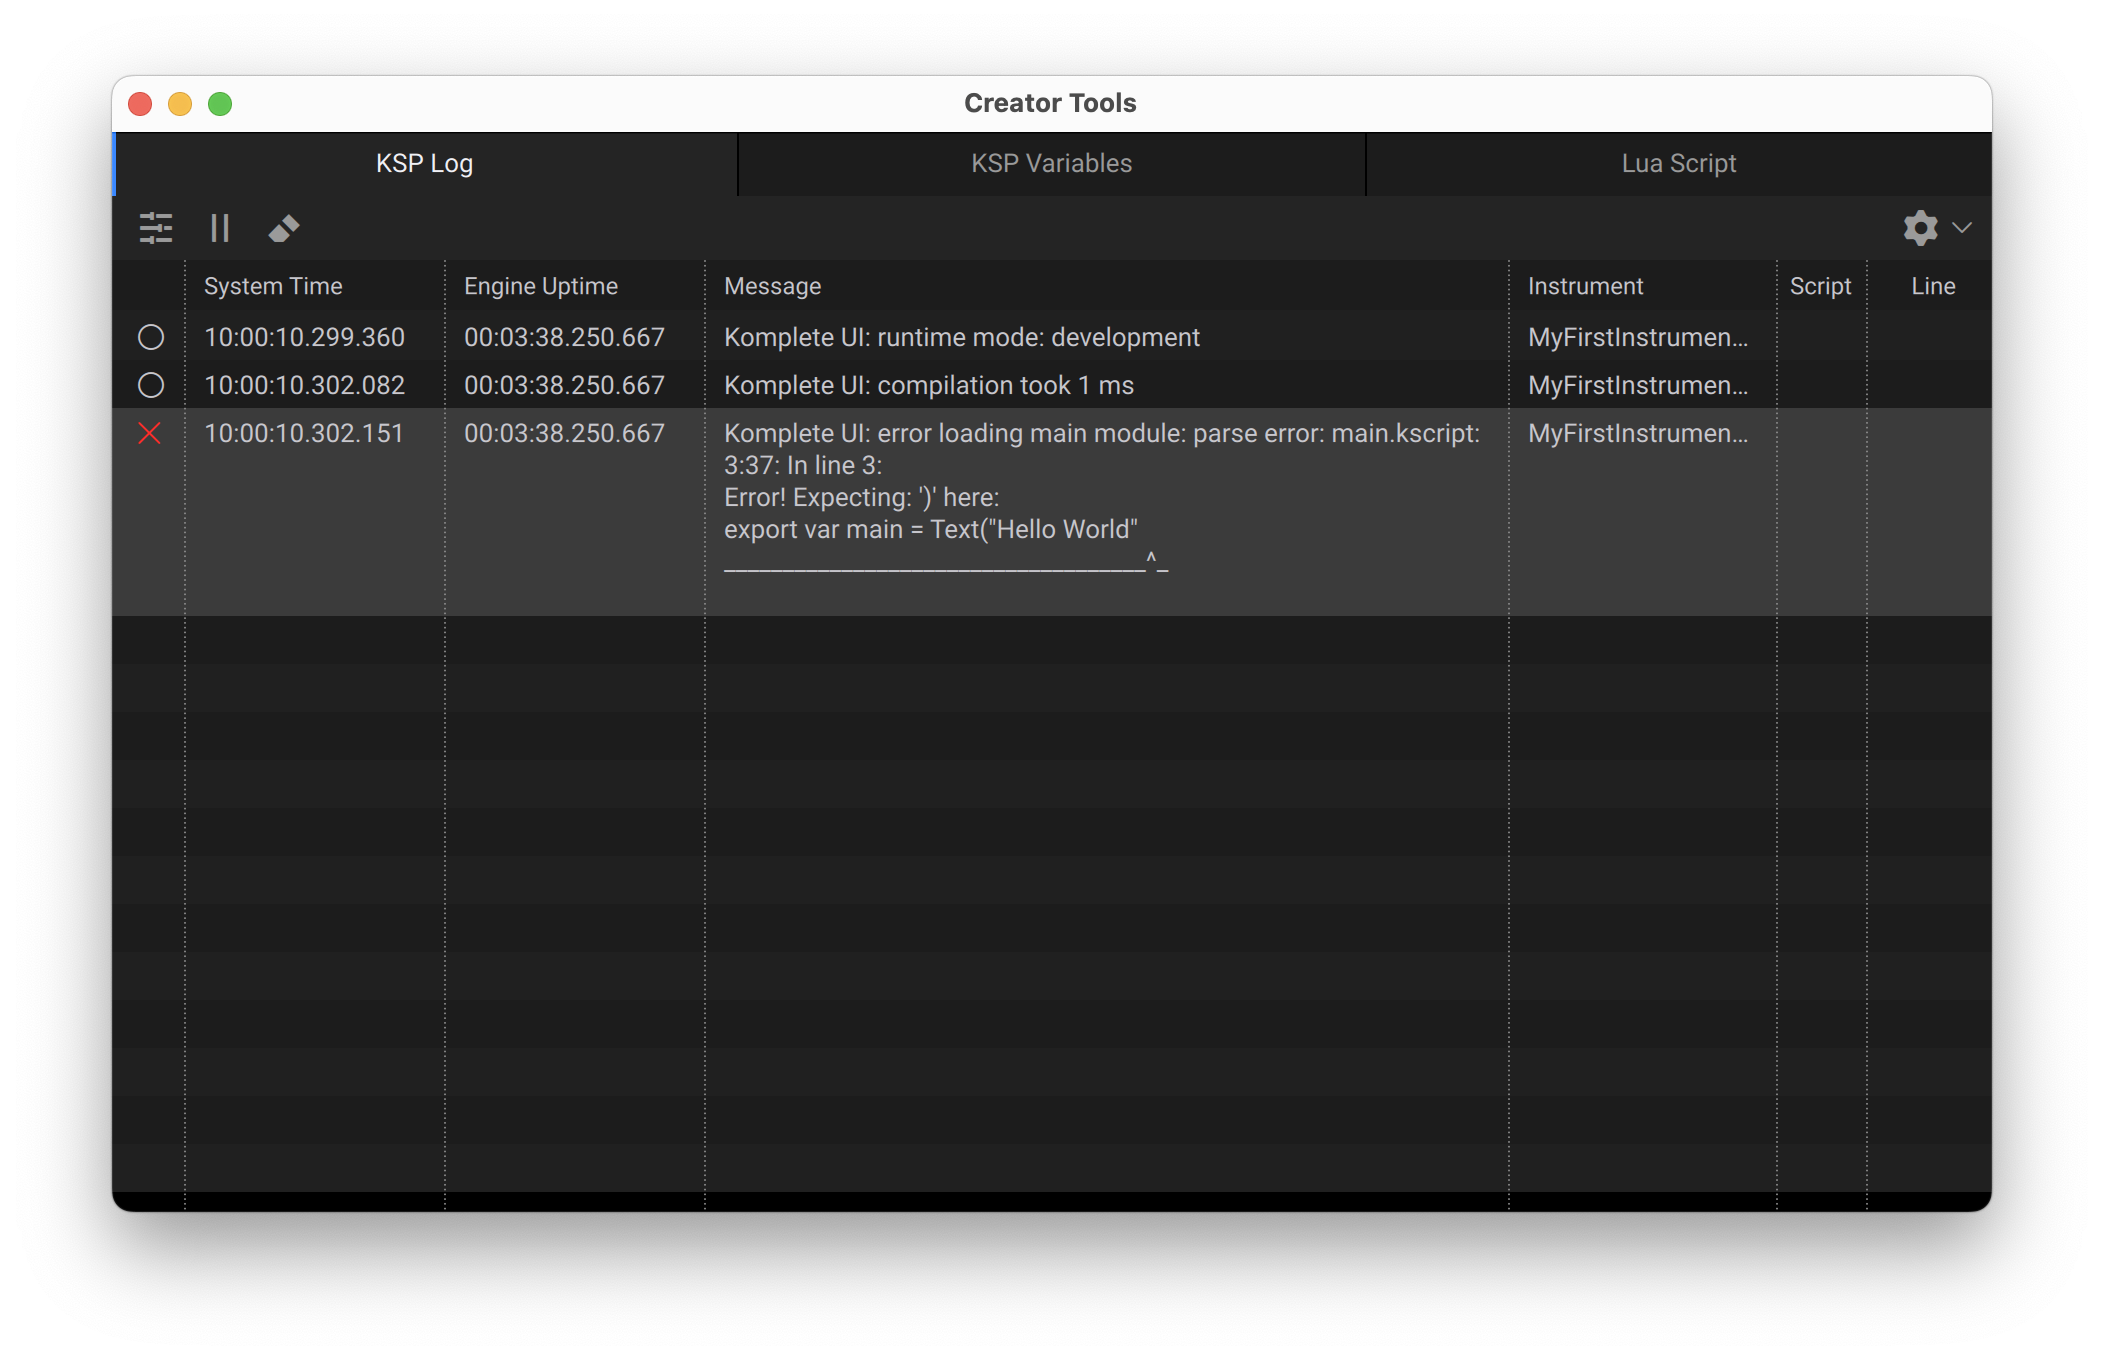
After opening Creator Tools go to your editor (VSCode) and change something in the script. For instance remove a parenthesis, then save. A helpful error message will be displayed immediately in the KSP Log of Creator Tools.
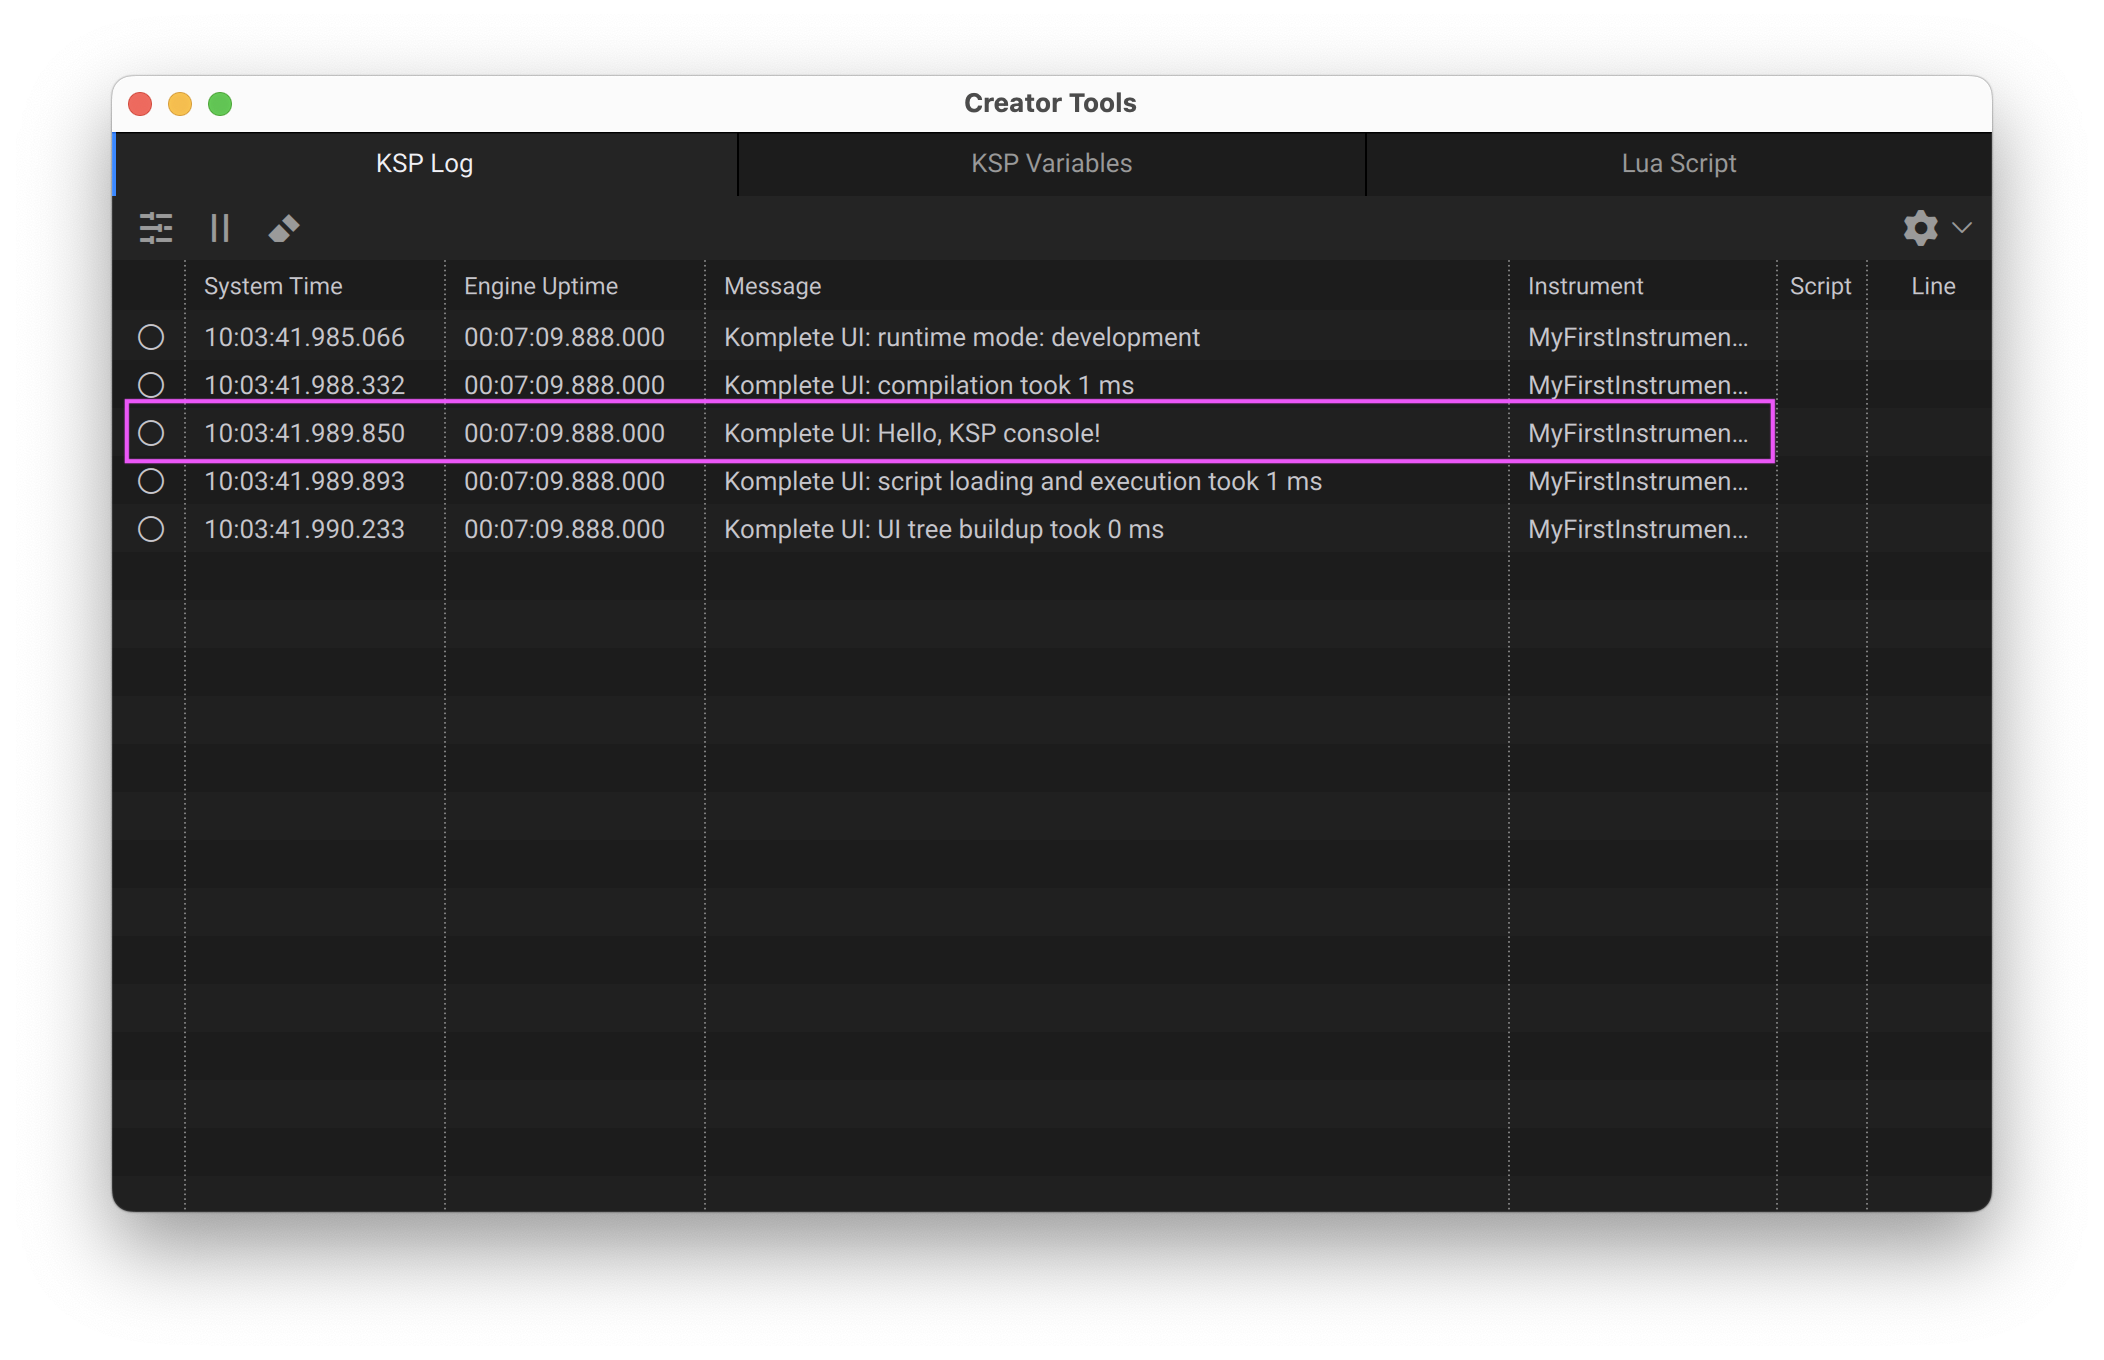
Alternatively, you can also use the print function to explicitly log messages to the KSP Log:
print("Hello, KSP console!")
There's a known issue where Creator Tools cannot properly get log messages from Kontakt / Komplete UI. In this case, close both applications, then re-open Creator Tools and after that re-open Kontakt. Now log messages should show up.
With a Terminal
If you launch the Kontakt app from a terminal window, you will get logs from Kontakt, including Komplete UI logging and errors, in the terminal. For ease of use, you can create a custom task in Visual Studio Code that launches Kontakt from a terminal. Here are the steps for doing that:
-
Press
Ctrl+Shift+P(Cmd+Shift+Pon macOS) to open the Command Palette. -
Search for the command
Tasks: Open User Tasks, press Enter, then chooseOthersfrom the list. -
Replace the text in the newly created
tasks.jsonfile with the one below, then save.{
"version": "2.0.0",
"tasks": [
{
"label": "Kontakt 8",
"type": "shell",
"command": "\"/Applications/Native Instruments/Kontakt 8/Kontakt 8.app/Contents/macOS/Kontakt 8\"",
"windows": {
"command": "\"C:\\Program Files\\Native Instruments\\Kontakt 8\\Kontakt 8.exe\"",
},
"args": [],
"problemMatcher": [],
"presentation": {
"echo": true,
"reveal": "always",
"focus": false,
"panel": "shared",
"showReuseMessage": true,
"clear": true
},
}
]
} -
In Visual Studio Code's main menu go to
Terminal>Run Task...and selectKontakt 8to open the terminal along with Kontakt. From now on every time you want to launch Kontakt, you can perform this step.
On Windows, it is necessary to set the default terminal profile to Command Prompt. This is done with the command Terminal: Select Default Profile. See here.